The Peloton Bike/Bike+ (and associated platform) is by massive margins the most popular consumer fitness bike in the world, and largely for good reason: It just works. Every…single…time.
But up until the Bike+, there were elements that weren’t as polished. For example – accuracy of the power output that drives the platform’s leaderboards. Plus, it wasn’t a ‘true’ smart bike in that you manually controlled the resistance. However, the Bike+ aimed to fix both those issues, as well as address other areas too. And after five months of using it, I’ve got a pretty good idea on where it works well and not so well.
Still – regular endurance-focused readers of this site might be surprised to see me riding (and reviewing) a Peloton Bike. Nonetheless I’d encourage you to give this post a read. Not because you need to go out and buy a Peloton Bike (or Bike+), but because I think you’d be surprised about some of your preconceptions about Peloton. From the courses to the accuracy, I’m probably going to turn your assumptions upside-down. Not to mention there’s very good reason that other apps/platforms should follow some of the technical things that Peloton does well.
Which hardly means the platform (and specifically Bike+) is perfect. As you’ll also see, there’s plenty of quirks that can frustrate both beginner and advanced users alike. And after these nearly 5 months with the Bike+, I’ve got a pretty solid feel for those – especially in comparison to over a year with the Bike. And I still alternate usage on both bikes on a weekly basis (the Bike+ at my office, and Bike at home).
With that – let’s dive into it!
Note: I purchased the Bike+ myself, and as I’ll explain in a moment even paid to rent a van and drive across international borders to pick it up. Neither this post, nor any other post I write, is sponsored by Peloton or anyone else in the sports tech industry. If you found this post useful, consider becoming a DCR Supporter which makes the site ad-free, while also getting access to a mostly weekly video series behind the scenes of the DCR Cave. And of course, it makes you awesome.
What’s New & Different?
When the Bike+ came out, I wrote an entire post and video on what’s different between the Bike & Bike+, so I won’t rehash all the nuances here. Instead, I’m just going to skim through those items. We’ll cover all of the core Bike+ features and hardware throughout the review. And then next week, I’ll finally publish my Peloton Bike (non-Plus) review. That review will be very similar to this one, except on different hardware. And if you read nothing else but the accuracy section of this review, you can see the only remaining difference not shown in this section.
There are two major features that have (rightly) garnered most of the attention of the Peloton Bike+, the new bigger/swiveling screen as well as the Auto-Follow digital resistance system. However, there are numerous smaller things that have changed. So this is an attempt to catalog all of those things in one spot.
– Added Auto-Follow Resistance (aka ERG mode): Uses new digital resistance system that allows both manual and automated control of resistance
– Increased screen size from 21.5” to 23.8” (touchscreen on both)
– Increased from 2 rear speakers (2x10w each), to 2 front and 2 rear speakers (2x3w tweeters & 2x10w woofers)
– Screen can now swivel/rotate to just about any orientation: This is for doing core/yoga/etc workouts on the floor/space nearby
– Upgraded front-facing camera from 5MP to 8MP
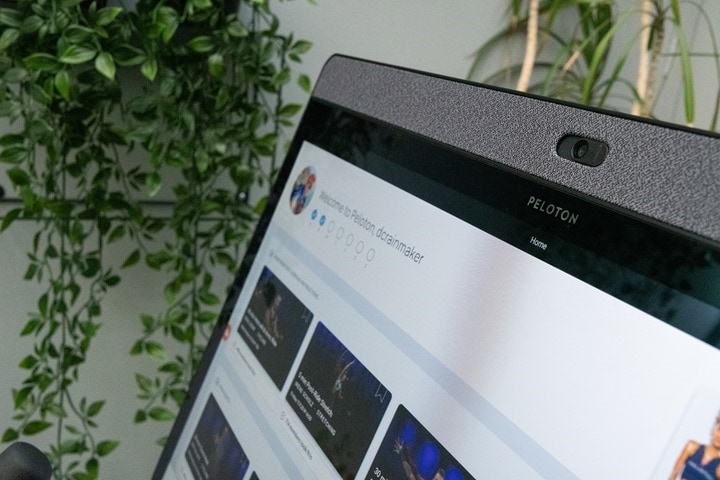
– Added privacy cover for camera
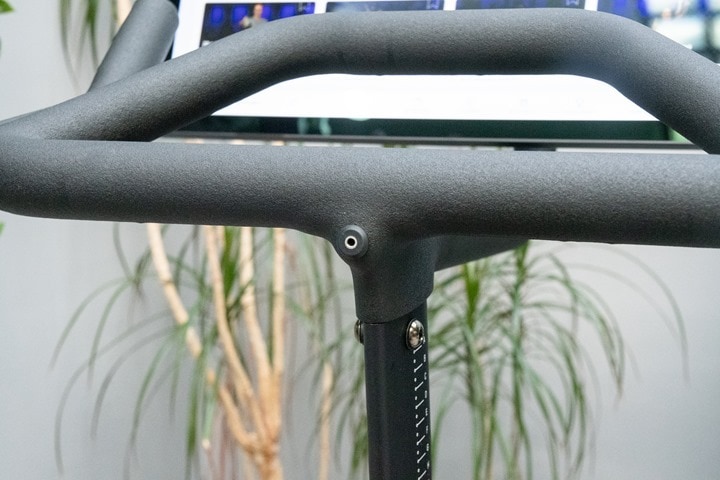
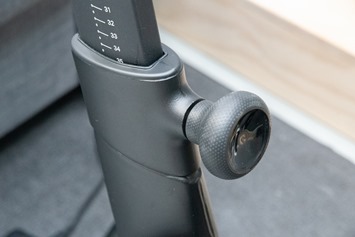
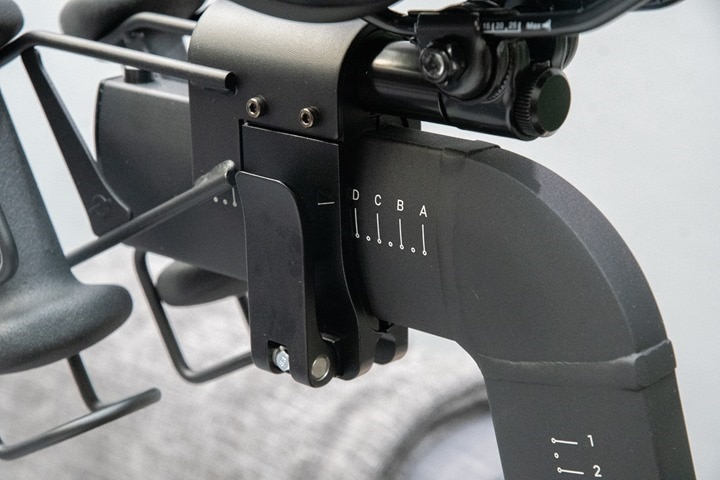
– Changed positioning knobs from longer to circular style for seatpost/handlebars, and changed to quick-lever for saddle position
– Changed handlebar design/shape a bit
– Very slightly changed seat design
– Added Apple Watch GymKit integration: This allows integration with Apple Watch including heart rate to Peloton bike
– Power/Display cables are now all internally routed, versus externally before
– Switched to USB-C charging for the bike (65w adapter)
– Switched to USB-C power/connector for the display
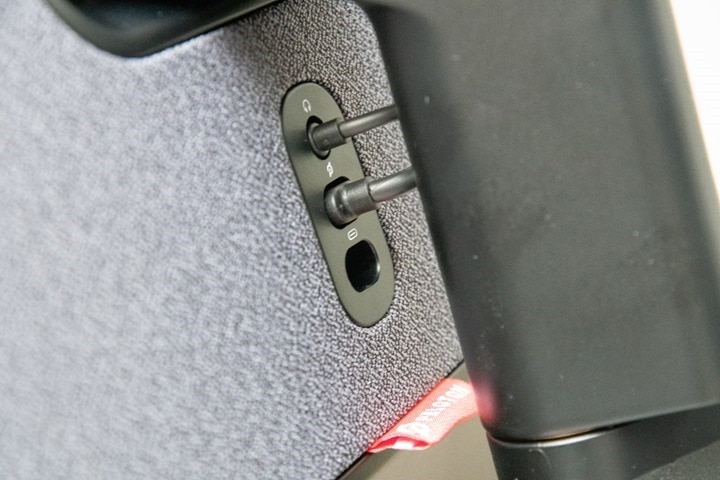
– Moved headphone jack to front of handlebars from side of display
– Moved volume buttons from back-edge of display to side of display
– Updated from Bluetooth 4.0 to Bluetooth 5.0
– Increased WiFi support to include 5Ghz WiFi networks (802.11 a/b/g/n/ac)
– Removed micro-USB port, swapped to USB-C port (and it can charge devices like your phone)
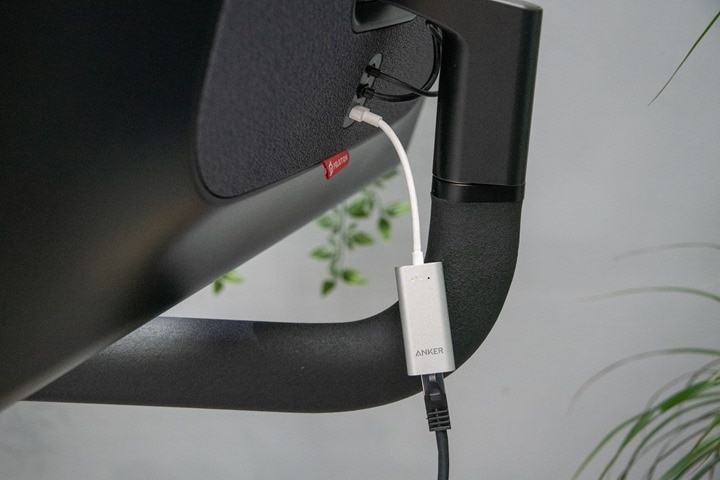
– Removed wired Ethernet port (you can use a USB-C to Ethernet adapter though)
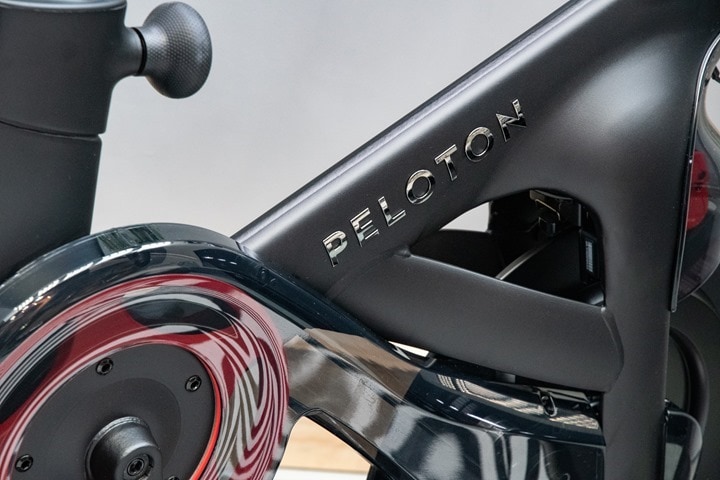
– New shiny Peloton logo on sides added
– And of course, increased the price to $2,495 (vs $1,895 for the original Bike, which was $2,245 prior)
From an underlying specifications standpoint, there are some changes here as well. Here’s a handy table outlining the hardware bits.
And, just a few things that haven’t changed:
– Same max rider weight of 297lbs
– Same min/max rider height of 4’11” and 6’4″
– Same support for ANT+ or Bluetooth Smart heart rate straps/sensors
– Same ability to move it around a room using the wheels
– Same flywheel, best I can tell (without taking it apart)
– Same positioning/adjustability markers on the side of the bike
– Same pedals
– No broadcasting of power or cadence over ANT+ or Bluetooth Smart standards
Phew!
Now, we’ll talk later on whether the new Peloton Bike+ is ‘worth it’ compared to the existing one. But in general, my recommendation between the two is that if the price difference ($600) isn’t a major factor for you, I’d recommend going with the Bike+ over the Bike because it’ll likely give you longer feature longevity, and in my opinion the auto-follow and significantly increased accuracy are worth it. The bigger screen is icing on top. Yet at the same time, I do half my Peloton workouts each week on a regular Bike. It doesn’t massively change my (or my wife’s) workouts.
Delivery & Setup Process:
In a pre-COVID19 world, Peloton would deliver your bike to you inside your home to your living room or such. These days however (understandably), they deliver it fully assembled to your doorstep. After which you simply roll it in your home, plug it in, and set up the WiFi. That process is super quick.
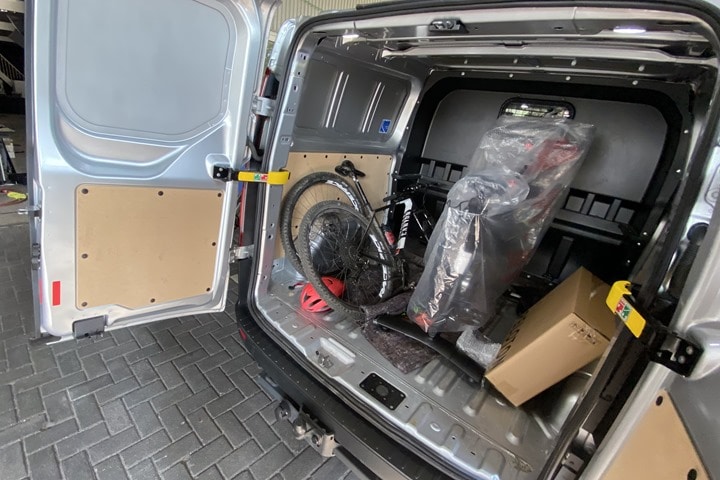
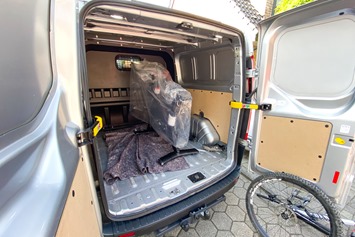
However, that is not this world. And when my Bike+ was delivered last fall, I had specifically requested it not be brought inside the home. Mainly because…it wasn’t my home. In fact, it wasn’t even in my own country. Instead, a DC Rainmaker reader in Germany offered their residence as a delivery spot, a mere 1KM across the border from the Netherlands (where I live). Peloton would deliver it to his garage, and I’d pick it up an hour later – still in the plastic wrap, and monitor still in the box.
From there I’d drive it back across the border, the two hours or so back to Amsterdam (stopping along the way to get a mountain bike ride in). That’s because Peloton does not yet sell bikes in the Netherlands (but does in Germany). For those of you that think this sounded complicated, I’d suggest you go view my Instagram Story Archives on me buying and relocating my first Peloton Bike (non-Plus) from the US. That included dismantling it in a Vegas hotel room, and then eventually rolling up to the United Airlines baggage check-in desks with boxes of dismembered Peloton Bike parts. I promise – that 200-story long Instagram archive is worth it.
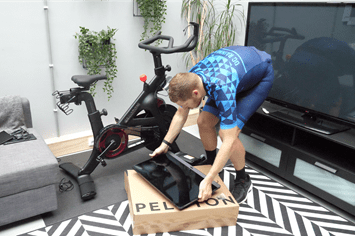
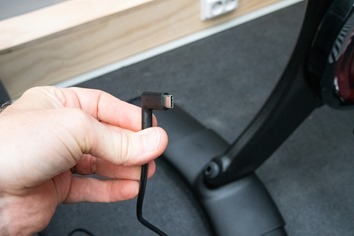
My point here though is more simplistic: I didn’t get either a “normal” Peloton delivery process or a special one. Ultimately, it had zero impact on my Bike, because it’s silly easy to attach the monitor and connect it up to WiFi. If you can put together an Ikea lamp, you can put the monitor on your Peloton Bike+.
Here are two photos of my attaching a monitor and plugging in a couple of cables:
Note that neither the weights nor the Peloton mat come with the Bike+ by default. In my case, I have the Peloton weights and mat from my original Peloton Bike, though you can simply buy cheaper ones online too. I also didn’t buy the cycling shoes, as I have plenty of my own cycling shoes.
The Bike Hardware:
Unquestionably, the piece of the Peloton platform that makes Peloton…well…Peloton, is the hardware. Certainly, the concept of having a bike plus attached screen isn’t new by itself, but rather the complete cohesion between those pieces and the larger connected platform with live stream – that was largely new when Peloton first launched years ago. And we’ll get to that platform, but first we start with the hardware.
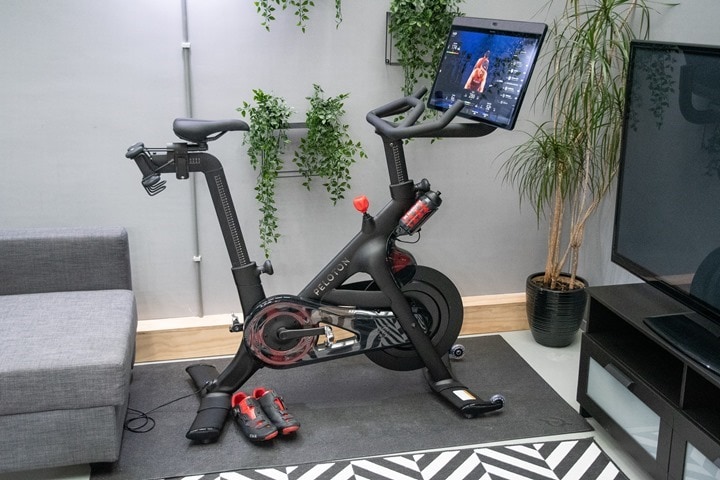
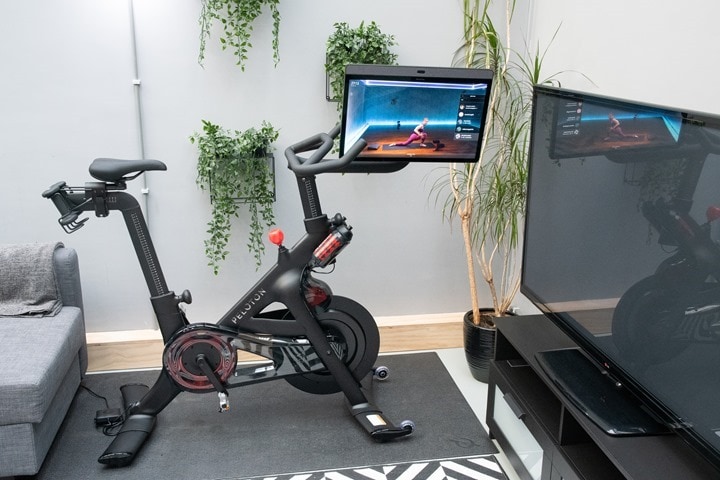
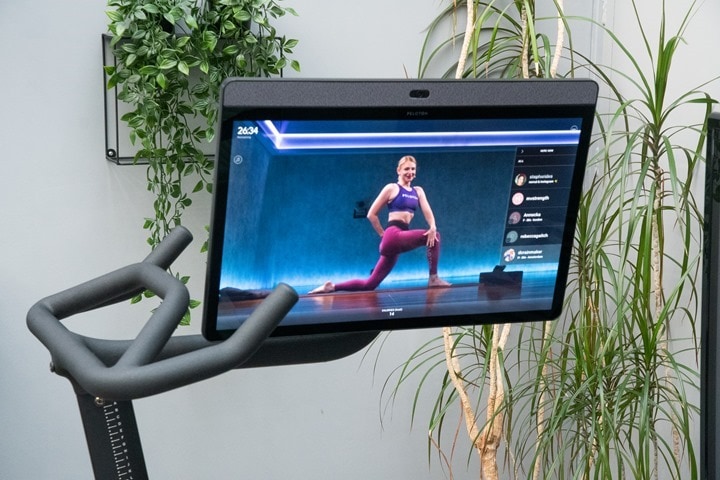
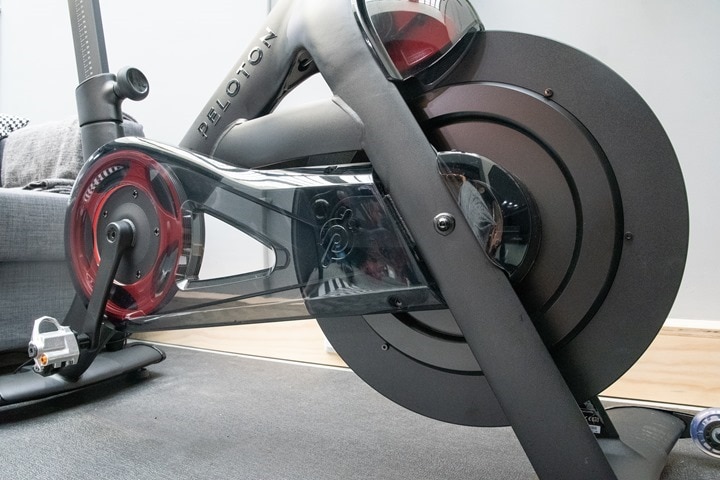
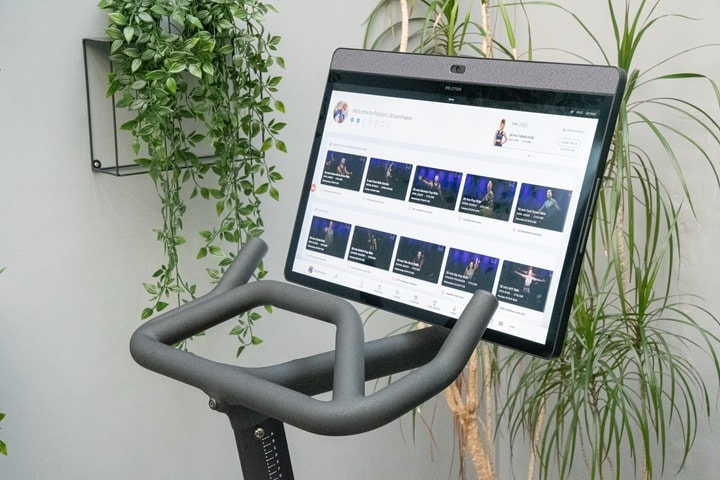
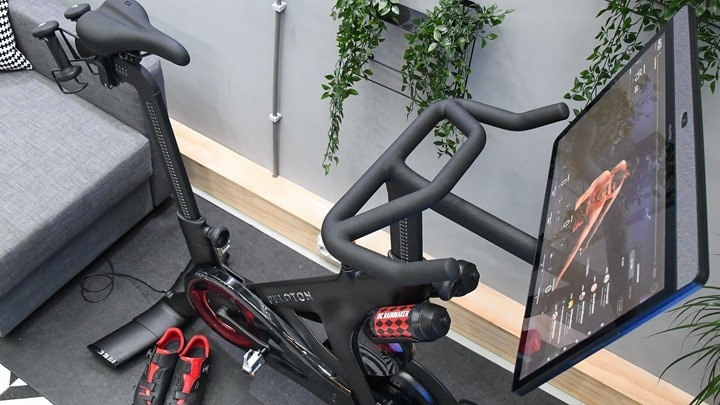
The fundamentals of the Peloton Bike+ in terms of the bike frame, actually haven’t changed at all compared to the original bike. The ‘metal’ parts of the bike are identical between the two models. Instead, it’s the new screen and smart resistance unit that are appreciably different. The large touchscreen now swivels 360°, albeit in two 180° chunks (so as not to endlessly twist the cables). The idea here being that you could rotate it to do other off-bike workouts, such as yoga, core, or stretching.
Hidden at the top of the screen itself are 2 front and 2 rear speakers (2x3w tweeters & 2x10w woofers), which are more than loud enough for any reasonable room situation. On the side of the screen are dedicated volume buttons. When you press them it’ll also allow you to change the balance of the audio to favor the instructors over music, or vice versa (or keep the default of evenly blended). There isn’t any option though to totally silence the music.
You can though stream via Bluetooth to other speakers if you want to, as well as to Bluetooth headphones. There’s also a dedicated headphone jack that’s been moved to the front of the handlebars (whereas on the original Bike it’s on the screen, which can be a bit far away for most standard headphone cables).
I’ve used both, but primarily have used Beats PowerBeats Pro headphones, and they’ve worked without issue. No dropouts.
On the back of the Peloton Bike+ display there is an extra USB-C port, which you could use to charge your phone, or plug-in a USB-C Ethernet adapter. The Bike+ removed the built-in Ethernet port that the original Peloton Bike has. All Peloton Bikes have built-in WiFi.
Here’s a USB-C ethernet adapter. This particular one is perhaps 1mm too chubby, but a mere 5 seconds with a simple knife to shave off just a hair of extra rubber from it fixed it right up!
While there is no secondary display port here, you can cast/mirror your screen to a larger TV or screen from within the Peloton menus, this is compatible with TV’s that support mirroring (note: It’s not compatible with Apple TV or Airplay). It’s also useful for doing core exercises/etc on a bigger screen.
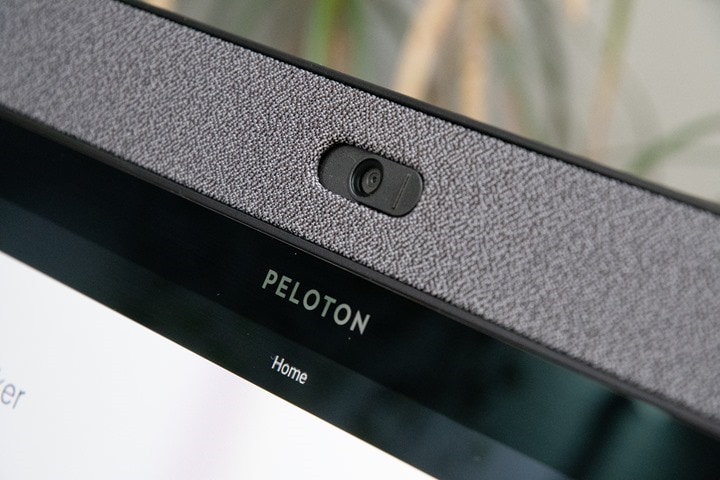
The display does have a camera on the front of it, which can be used for video-chatting with friends during a workout. More importantly though, you can slide the little cover over the camera – a feature that the original Peloton Bike doesn’t have:
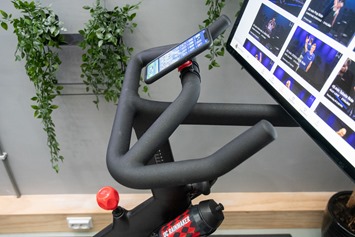
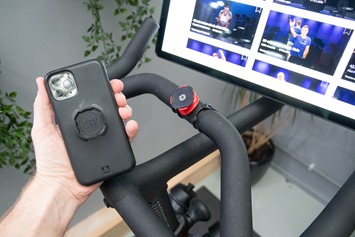
The Peloton Bike+ handlebars have no place for a phone. While you can place a phone down in the water bottle holders, I do like being able to stash a phone on my handlebars, especially if I need to keep an eye on a sleeping baby during a nap. I use a Quadlock mount with Quadlock case, but realistically you can use anything you want.
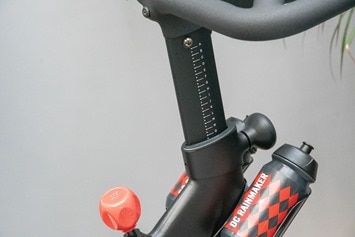
The Peloton Bike+ has three core adjustability areas, and a fourth minor one with saddle tilt. Without tools you can adjust the seatpost (which holds the saddle) height, the entire handlebar/display assembly, and the seat position forward/back (moving it closer or further from the screen). For the seatpost/front handlebars, those are adjusted using two giant knobs. This is an improvement over the straight handles on the original Bike:
Whereas the seat sliding forward/back is done via a clamping lever. Finally, it uses standard saddle rails, so you could both adjust the seat angle as well as even replace the entire saddle if you wanted to.
In general with cycling, most on-bike comfort issues come from having the wrong saddle (especially too soft a saddle). I’ve found this saddle perfectly acceptable for an hour or less ride. I haven’t tried to do a 2-3 hour ride on it…because…I see no reason to do that. But, given I’m constantly testing both real-world and indoor bikes, my ass has long gotten used to riding different saddles without negative impact for rides under a few hours in duration.
Anyway, my point there is simple: If you want to change the saddle you can.
And my secondary point is also simple – adjusting the bike between riders in your family would take only 5-15 seconds. When my wife rides the bike (who is a foot shorter than I am), it takes me 5-8 seconds to adjust the bike back to my position. And vice versa.
One note is that there isn’t any way though to move forward/back the display. Peloton’s line of bike-fit thinking here is essentially that everyone scales in height/arm length linearly. Of course, that’s not the real world (and is exactly why most smart bikes allow fore/aft quick changing of both the seat/saddle and the front handlebars – Peloton doesn’t allow any fore/aft handlebar changes). As such, some people might struggle to find the right/proper fit here. Again, for the durations that you’re riding a typical Peloton session (45 mins, +/- 15 mins) it’s likely to be less of an issue.
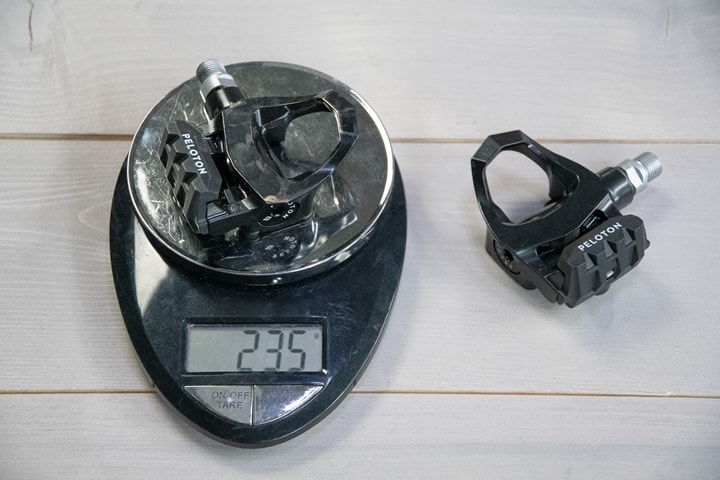
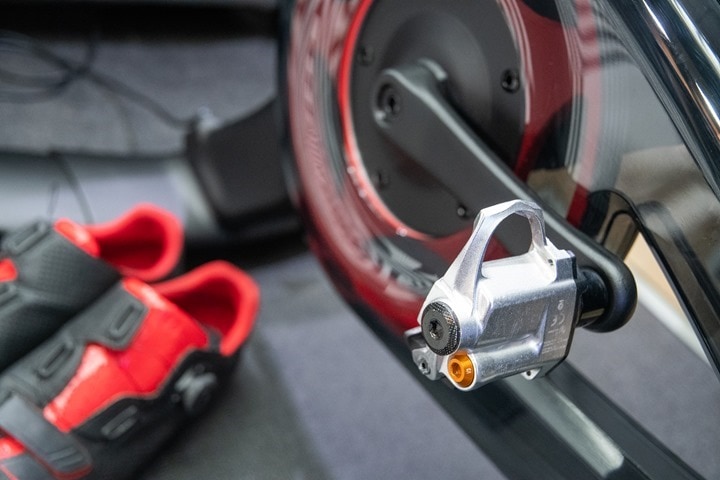
Heading on down to the crank arms, Peloton includes clip-in pedals. These massively heavy Look Delta style pedals enable you to clip-in with Look Delta cleat cycling shoes. Seriously, these things are so incredibly heavy compared to normal bike pedals. They weigh 234g each, whereas a fairly normal pair of pedals weighs 140-160g each. Realistically, that doesn’t matter here on an indoor bike – other than the hilarity of it. Note that Look Delta and Look KEO are mostly compatible with each other – just without quite as good of clipping in/out feel as being natively on one or the other.
In my case, I replaced these pedals with my own pedals. I did this because it allowed me to compare the power accuracy of the Peloton bike with that of known good power meters. You can keep the pedals or replace them if you have other cleat types around your home already. There’s nothing proprietary about the threads on the Peloton crank arms – it’s all standard issue crank arm threads.
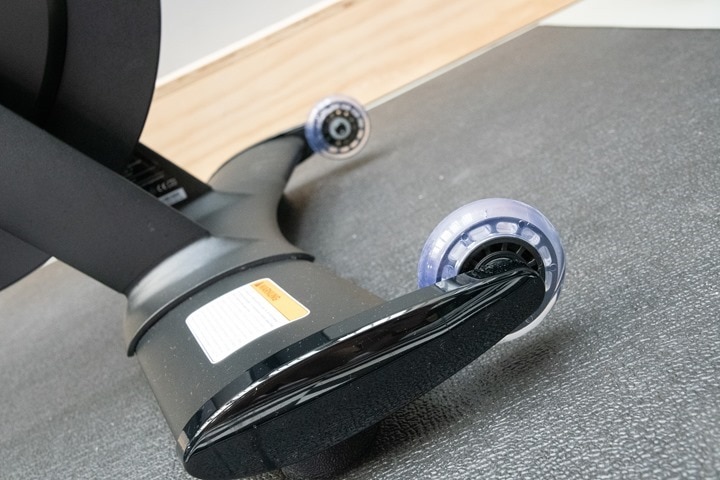
Scooting down towards the bottom of the bike, there are two feet/legs to the bike. The bike is pretty darn stable, and I’ve had zero stability issues in riding either model over the last year. On the front feet are two wheels, allowing you to tip it upwards and then roll it easily wherever you need to roll it.
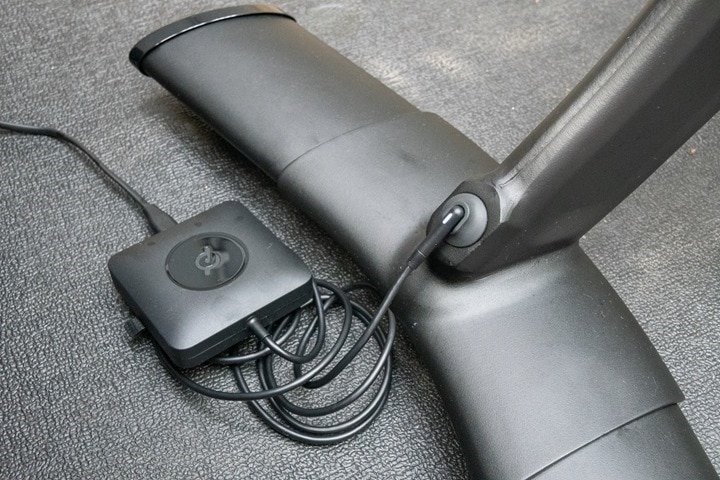
Meanwhile, on the back, there’s the power plug. On the Bike+ this is now handily USB-C (using a 65w power adapter). Frankly, this is awesome, and I wish other smart bikes did this. Heck, I wish other trainers did this. I could literally grab this and charge my laptop if I needed to. See…standards are amazing, huh?
Here’s a closer look at that adapter, because I know the geeks in you want to see it:
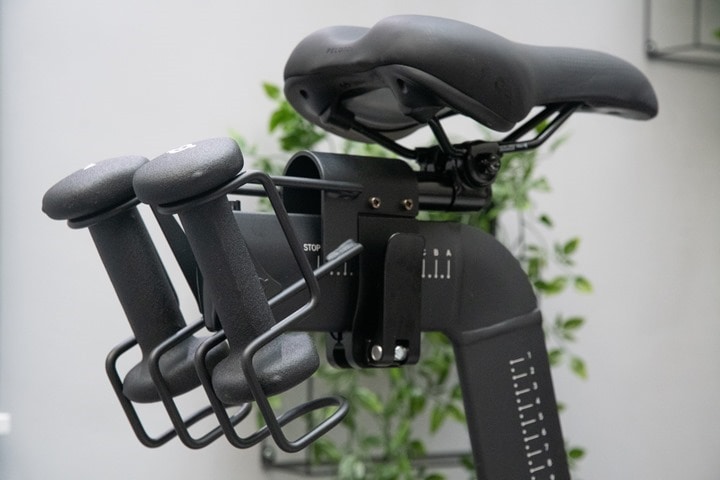
Directly above the power adapter, hanging off the back of your saddle are two weight holders. Unfortunately, these will be empty unless you remembered/realized you needed to pay extra for the weights. What’s annoying here is that the photos very clearly show the weights as being included on Peloton’s site (and still do). While the text lets you buy-up to another package with more accessories I didn’t need to include the weights. One would logically be under the impression that might be extra weights.
Anyway, I rarely do classes with the weights, so it’s not a huge issue per se – more just an annoyance. When you select a class you can even filter on whether or not to include any arm work. The stock weights (if you buy the accessory kit) are 2.5lbs (1kg), whereas you can also buy heavier ones instead.
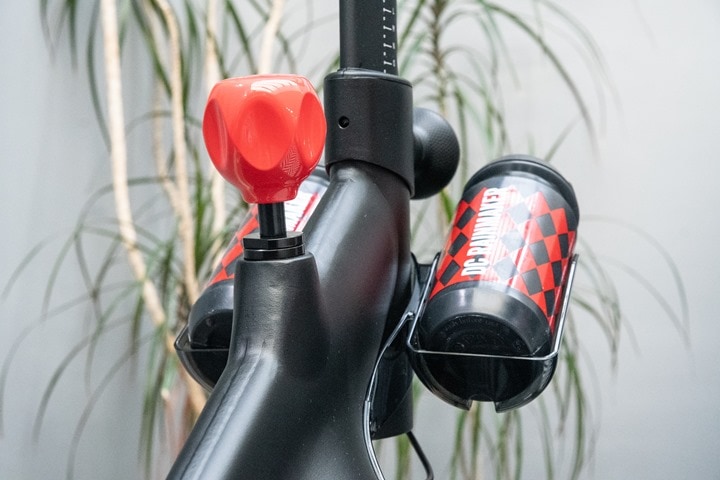
Meanwhile, above the front feet is the water bottle holder. It’ll hold two bottles. This is also a handy place for stashing a phone:
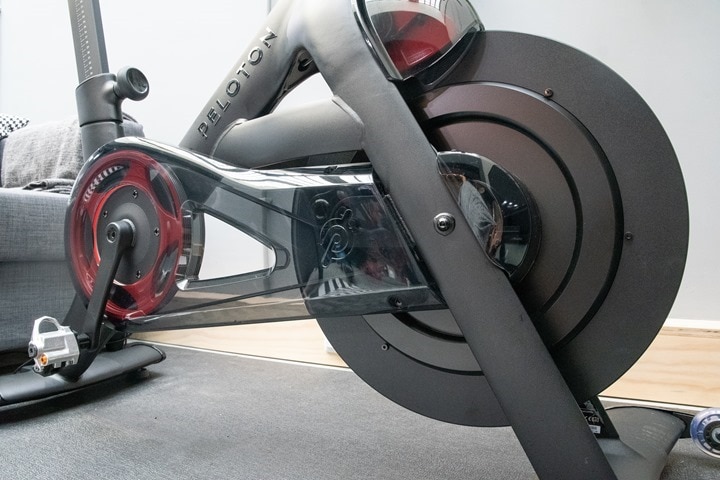
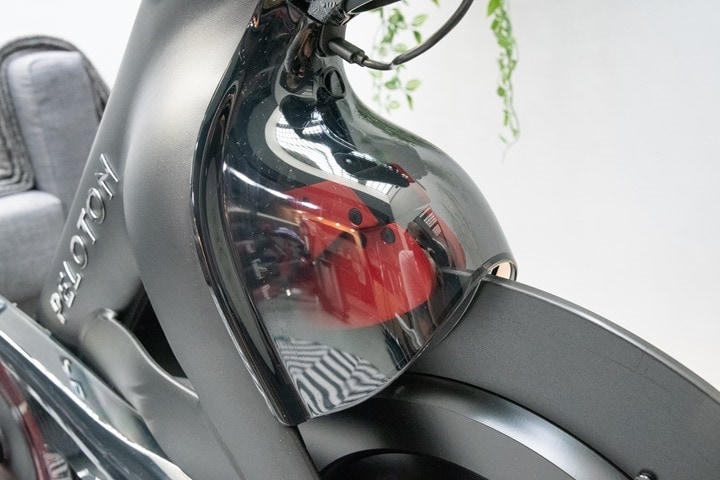
Finally, we’ve got the flywheel. The Peloton Bike flywheel is 38 pounds, and is tied to the drivetrain. Thus, like a spin bike, if you (try and) stop pedaling, the momentum from the flywheel will keep your legs spinning.
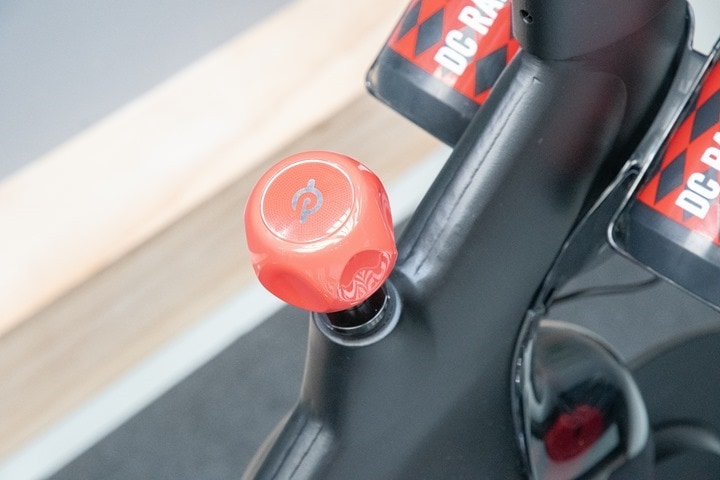
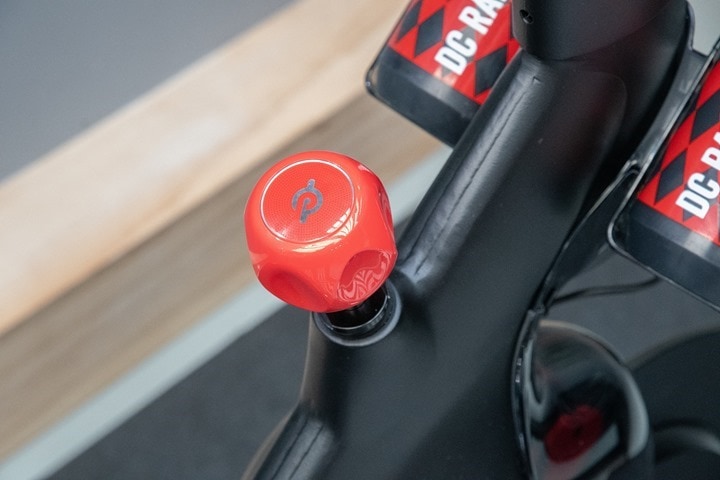
To change the resistance, you’ll use the red knob above the flywheel. This knob is astoundingly sensitive. A tiny millimeter or two change in direction can easily be 10w of resistance change (don’t worry, I’ll explain this later if you’re unfamiliar).
However, what’s new (and significant) in the Peloton Bike+ is the electronic resistance controller. See, in the original Peloton Bike, the Peloton platform couldn’t control the resistance (automatically or otherwise). You as a human had to spin the knob based on what the instructors are telling you during the class. But with the new resistance system, it’s now fully ‘smart’ and electronic – just like smart bikes or trainers. Thus you can optionally enable ‘Auto-Follow’ which will simply change the resistance on your bike to match what the instructors are calling out in the class.
The new ‘digital resistance knob’ also has far less resistance within it, required to twist it. Meaning, you can easily twist it with your pinky – whereas the previous Peloton bike would take a chunk of your hand to get it to change. Of course, that’s likely because the new knob isn’t technically exerting a force onto the wheel like the old knob. Instead, it’s simply telling the bike digitally to change the resistance using a different internal system. In other words, it’s acting more like a higher-end smart bike/trainer than a mechanically simple spin bike.
That’s because unlike the previous Peloton bike which literally was just a simple spin bike that then used a mathematical equation to determine your power, this is actually measuring it and then applying resistance to change it. In Peloton’s support articles they state that “The Peloton Bike+ is powered by a digitally-controlled resistance brake system that auto-calibrates and has a load cell sensor that measures output separately.”
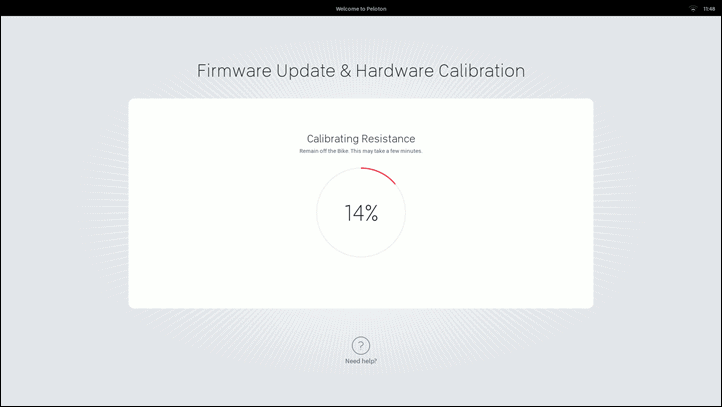
Upon first usage of the Bike+, it’ll do a self-calibration of the stepper motor where it moves it through the range and back again and calibrates itself. Peloton says this is a one-time operation, though you can trigger it again if you want to in the settings (in fact, I did after swapping pedals, because depending on how they measure load, the slight 30-gram change might impact the accuracy, so just to be safe on accuracy testing I re-calibrated).
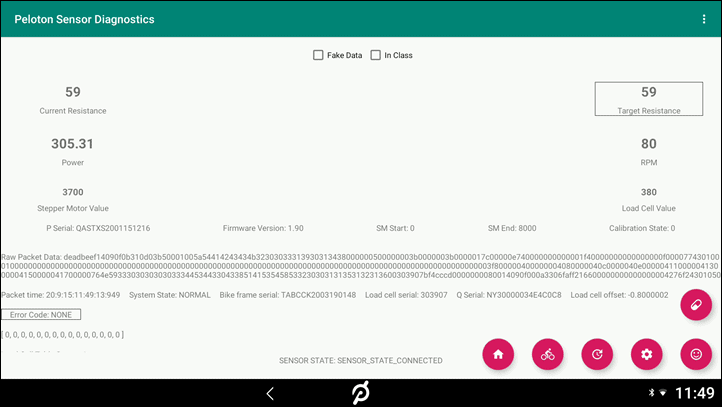
And in fact, if you crack open the apps on the Peloton Bike+ unit, you’ll even find a nifty diagnostic app for the digital resistance system and how it shifts the stepper motor.
Now we’ll get into the nuances of the Peloton Bike+ Auto-Follow system in the rest of the review. Which, is now a good time to cruise into the platform side of things.
With all of the hardware covered, it’s time to talk software.
The Peloton Platform Basics:
While the Peloton software platform is partially available on platforms like the iPad or web, the reality is that it’s substantially different, and better, on actual Peloton hardware. Sure, it’s the same video stream no matter the device you join from – but only the Peloton Bikes can contribute power/resistance data into the platform, and as you quickly realize – being able to match that information to what the instructors are saying is an incredibly different experience. I’ve used both the app and bike, and I just can’t mentally get into the app-only experience, due to the lack of having all the added bits that the Bike/Bike+ has.
In any event, this section in the review is all about the software components of that platform on the Bike/Bike+ itself. The next section is explicitly about the riding of a class (or two). While it might sound silly to separate them, there’s so much outside of just riding a class that’s worth noting.
First though, you’ll need to login to your bike. What’s cool here is that you actually pay on a per-bike basis. So if you’ve got friends in town, they can set up a profile on your bike for free and use it anytime they visit. Some of our friends/family have done exactly that and it works well. It also means both my wife and I don’t need to pay extra for usage of that bike.
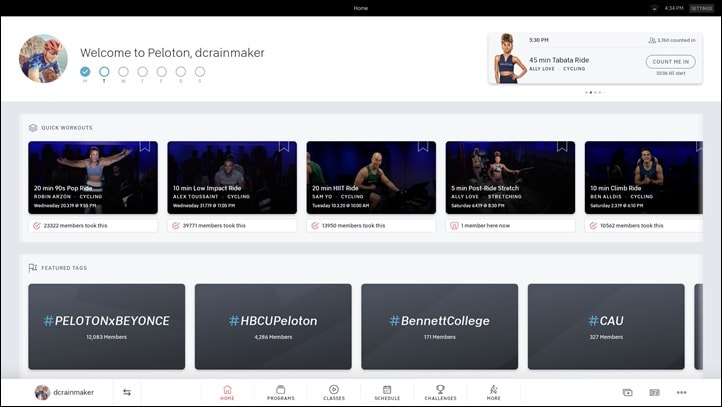
Once logged in you’ll see your dashboard. In the upper right corner you’ll see either currently live or upcoming live class, while below it in the middle you’ll see quick workouts. Below all that you’ll see a bunch of tags. Oddly, this is very different than my regular Peloton Bike, which is far more dynamic and has tons of sections on recent rides, rides I might like, etc… I can’t see any obvious difference between why my Bike+ dashboard is so different than my Bike non-Plus dashboard.
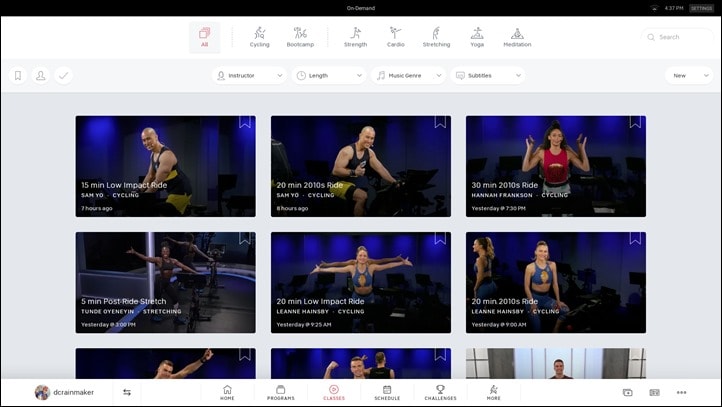
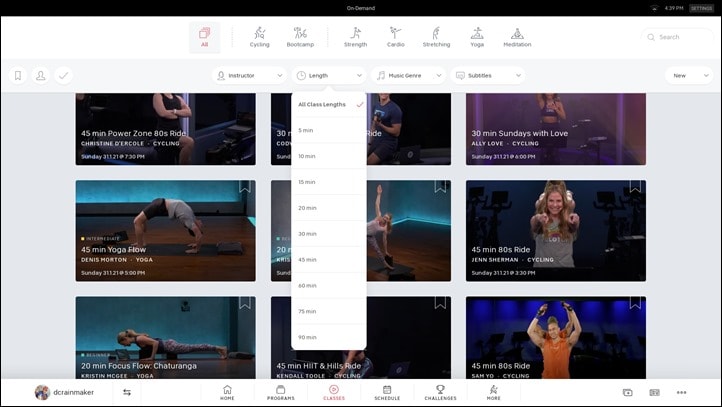
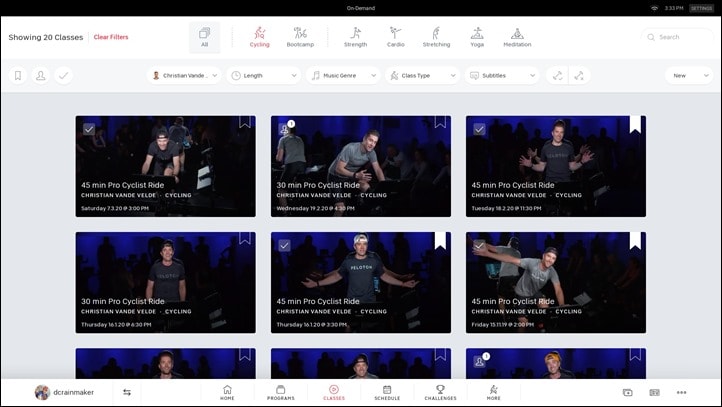
Thus I typically go ahead and tap the ‘Classes’ button at the bottom, which shows in reverse order the classes that have been finished. As you can see, this screenshot was taken at ~4:30PM Central European Time, and there hasn’t been a live class for 7 hours.
You can use the filters at the top to change duration, instructors, genre, or other aspects like the specific workout type. For example, here I’ve filtered cycling workouts that are 45 minutes long. At that point I can also choose to filter out ones that require the weights, and then find the specific instructor or music I like best. As of this moment, there are 2,025 cycling workouts that are 45 mins in length.
Workouts range in length from 5 mins (159 of those, mostly warm-up/cool-down) to 90 minutes (just 7 of those). Most are 20-45 minutes. There are 1,816 classes of 20 mins in length, some 2,816 being 30 mins, and 175 being 60 minutes. All of the 75-90 minute classes are Power Zone Endurance rides.
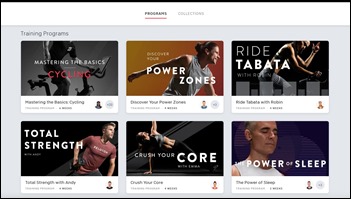
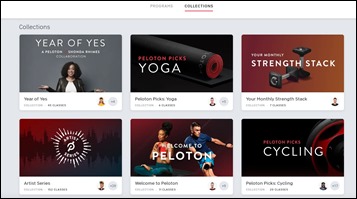
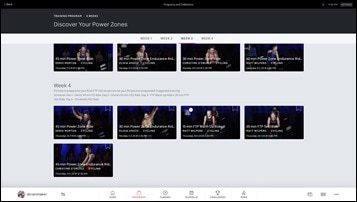
Next, going back in the menus a bit there are the Training Programs, which are divided up into ‘Programs’ and ‘Collections’. Basically programs are something that theoretically are cohesive as a set of classes – like building atop each other. Whereas Collections are basically just a pile of like-minded classes.
For example, in the Power Zones program, you’d start off doing a 20-minute FTP test to determine your power zones (which then show up in all classes), and then over time build up through different weeks of rides:
Whereas a Collection is a set of classes around a given theme – either musical or non-musical, but often musical:
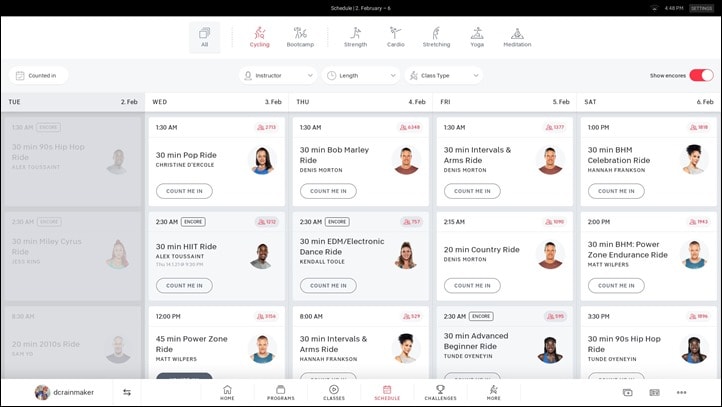
Next, there’s the schedule. This allows you to see upcoming live classes. This also can include encores, which are basically repeats, but with a reset leaderboard.
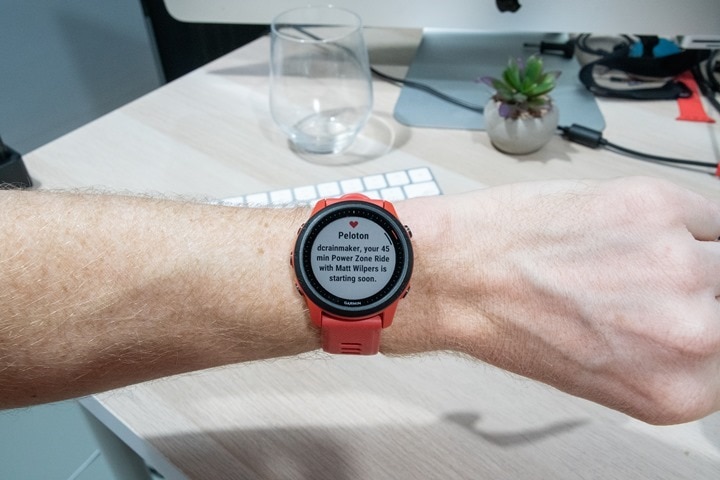
You can tap to add it to your list, where you’ll get a reminder prior to the class starting on your phone…or smartwatch.
In general, the live classes are really only focused for US East Coast. Sure, there’s a single class or two most mornings out of the London studio – and maybe another one sprinkled later in the day, but frankly – the amount they use that studio is kinda disappointing. And even their main Peloton studios, it’s hardly as if there are hourly classes, despite having nearly 30 instructors. Most instructors will only do 1-2 sessions per week. Ultimately though, you eventually kinda give-up on doing live classes, and just do pre-recorded classes. Which is too bad, because I find the live classes so much more engaging, just like the same way watching live sports is more engaging than watching something pre-recorded.
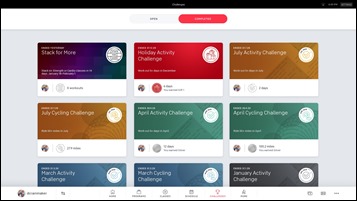
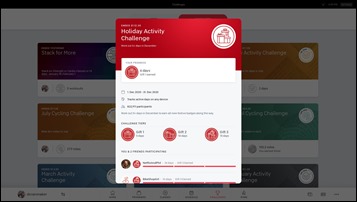
Next, there are challenges. These allow you to earn badges for completing various milestones. You can enroll in these, as well as see your friends’ status in these challenges.
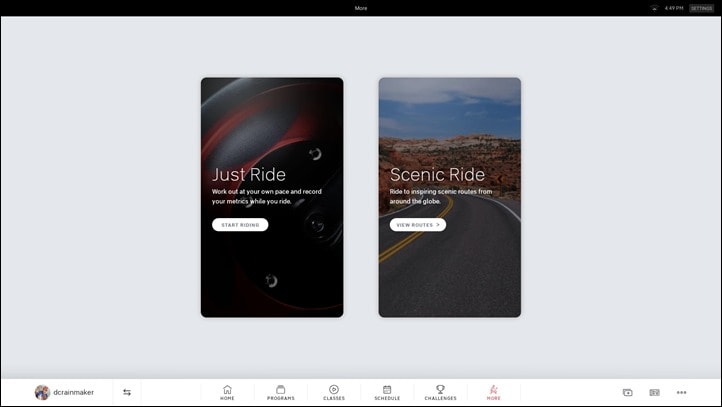
Then there’s the ‘More’ tab, which is basically the ‘We didn’t know where to put these’ tab. Within that there are two options: Scenic rides and free ride.
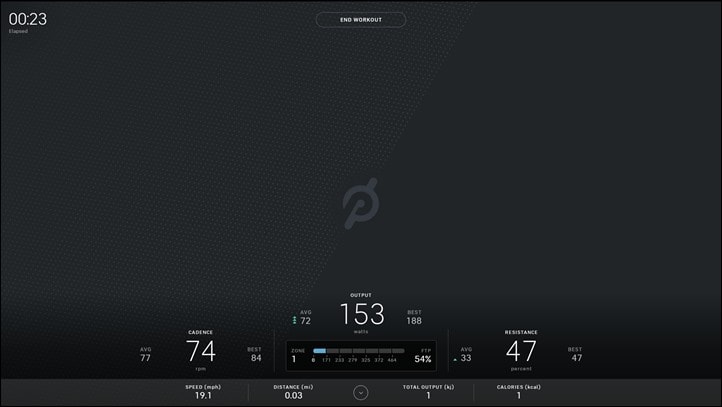
Free ride is useful if you’re following some other platform, or just simply want to zone out. There’s no instructor or music. It’s just you and a blank screen:
Note, Peloton does *NOT* broadcast your power or cadence out via ANT+ or Bluetooth Smart. This would be a silly easy thing for them to do, and would make modes like this appealing for using other training platforms. After all, you did pay $2,000+ for the bike – would be nice to use it beyond that if possible.
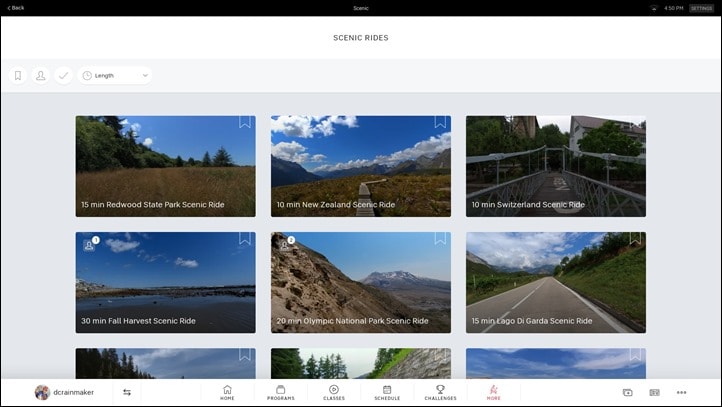
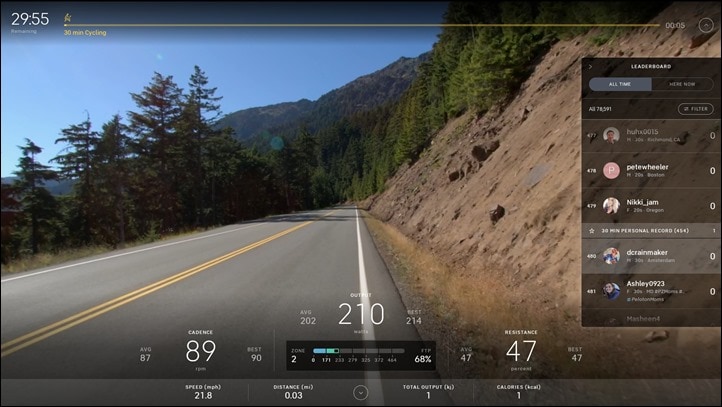
Whereas with Scenic Rides there are about 300-400 rides in there (more than I thought, until I counted them all up), where you just meander along pre-defined routes through mostly scenic areas. I say mostly, cause some of them are probably just better left as ‘Rides’ without the scenic part.
Unlike some online cycling videos, the speed of the video doesn’t change based on your pedaling speed. Rather, it’s just like turning on Discovery Channel or something, there’s no connection between your effort and the video.
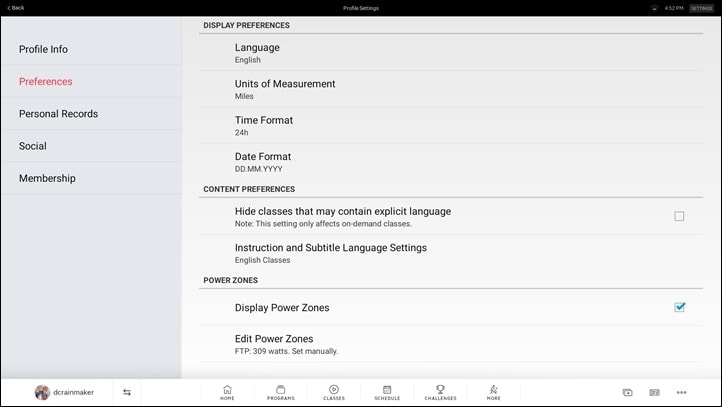
Rounding towards home here, there’s a bunch of settings related tidbits. These include your gender/weight/location/birthday, as well as preferences like language, units, time/date formats, and more.
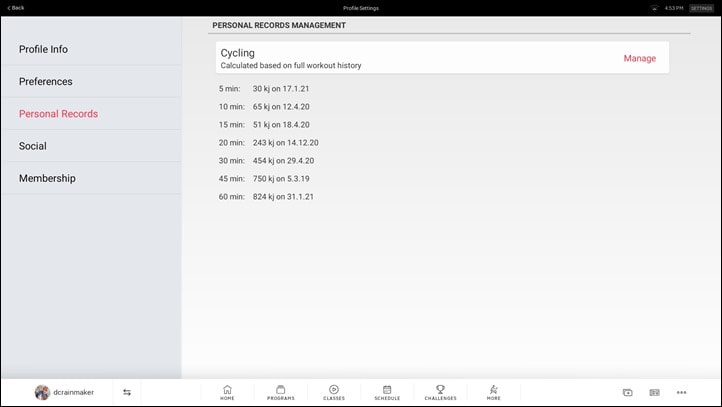
Also, it’s in here you can change your power zones, as well as reset personal records. I’d *strongly* recommend resetting your personal records if you go from a regular Peloton Bike to a Bike+, since it’ll be more accurate now. Just do it the first day you receive the Bike+ and don’t overthink it. Accuracy is better than fantasy. Mostly.
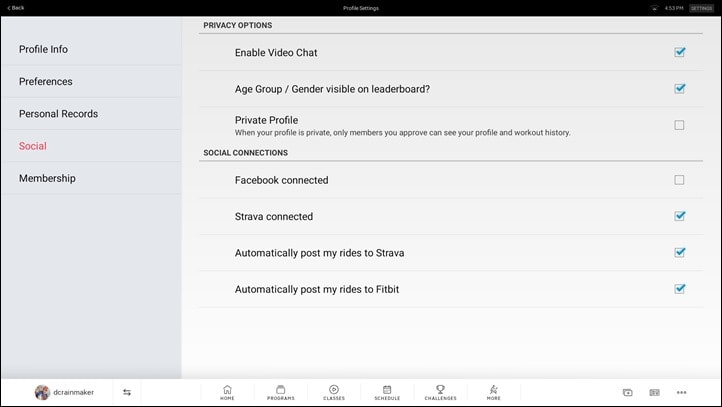
And then there’s the ability to link up to a handful of other 3rd party platforms, namely Strava and Fitbit for posting rides. Both of these have to be done on a Peloton Bike, versus the Peloton app. In fact, if you’ve got friends that don’t have a Bike, they can use your Bike just once to establish the Strava/Fitbit authorization, and then it sticks for any subsequent rides on their non-Bike apps. The same is also true of a Peloton store/studio/hotel/etc…
This is one area where the Peloton integrations are really pretty slim compared to where they could/should be. On the bright side, since Fitbit integrates with everyone, you can kinda leverage that in some ways to get workouts elsewhere. But still, Peloton sorely needs a better API – not just for integrations like this but the growing community that’d like to better leverage their data and love of the platform.
With that grand tour complete, let’s actually…you know…ride.
Riding a Session:
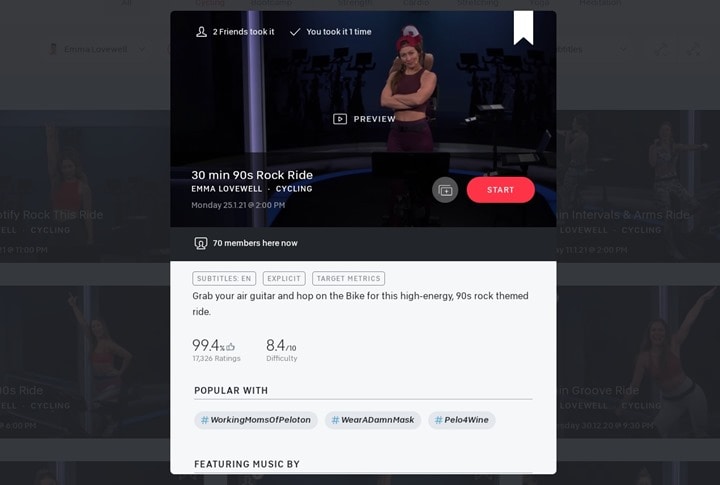
Once you’ve picked a class from the listing, you can tap preview to actually watch the entire thing if you want to, simply to skip around and see if it’s your cup of tea or not. I do that sometimes for class/instructors that I’m not as familiar with.
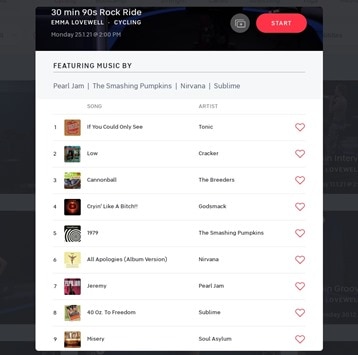
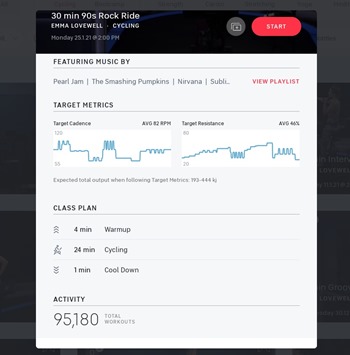
You can also scroll down to see the complete list of music in the class, as well as an overview of the power/output targets, as well as how many have taken the class (and up above you’ll see ratings and difficulty too):
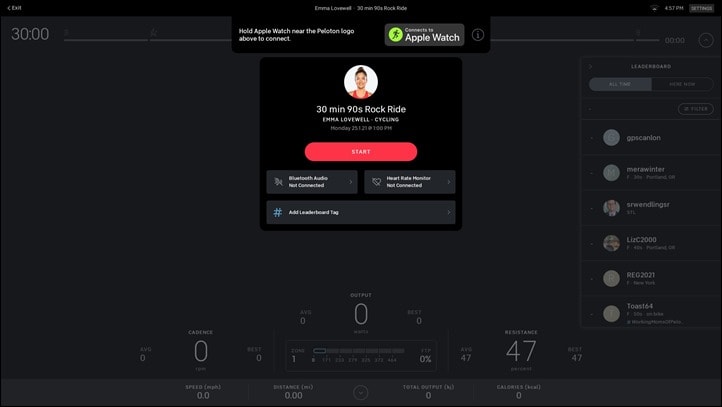
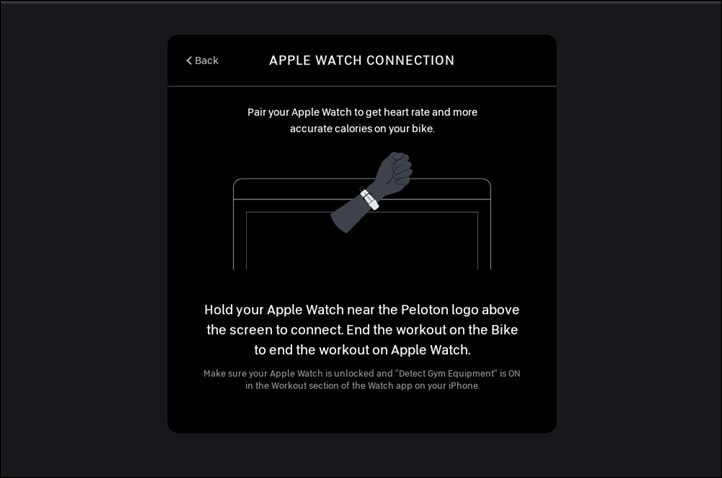
On the next page, you’re ready to pair any devices. This would be any heart rate straps (which are remembered between sessions), as well as any Bluetooth audio devices (like headphones), which are also remembered. There’s also the ability to pair up an Apple Watch via GymKit, however, that is oddly not remembered between sessions. So you have to tap that to the bike each time, then confirm it on the watch each time. While it’s hardly a big deal – I’ve never really understood why this requires double-confirmation when all other paired technologies just auto-pair. Isn’t that the point?
Now, the main benefit to natively connecting an Apple Watch is the integration of your Apple Watch’s heart rate sensor. But inversely, it also starts an activity automatically on the watch that’s kept in sync with the Peloton Bike+. Note – Apple Watch integration is *NOT* offered in any way for the regular Peloton Bike (even though Peloton could trivially add Apple Watch heart rate support via their iOS app, as other companies have done).
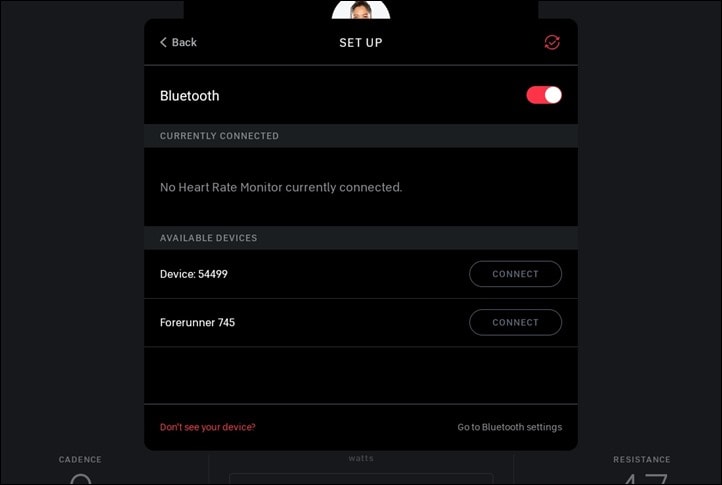
As for regular heart rate sensors, the Peloton Bike (and Bike+) support both Bluetooth Smart and ANT+ sensors, and I’ve used dozens of different sensors with it, without issue. For example, below you can see that I can pair up my Garmin watch as a heart rate sensor if I want. But I can just as easily pair a Polar heart rate strap or a Wahoo one. I’ve listed some of my recommendations at the bottom of this review.
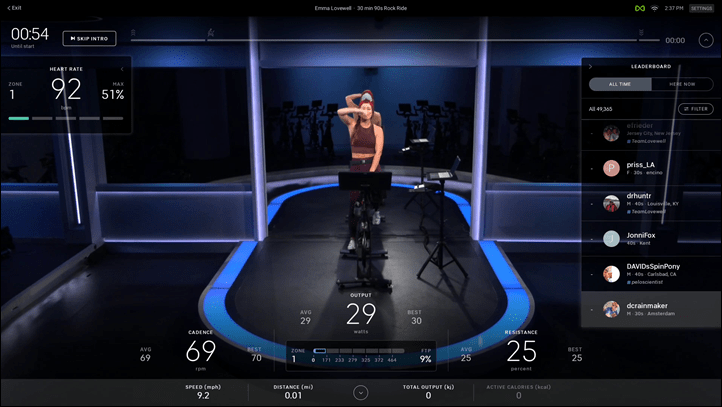
Now, you don’t need to manually pair each time, it’ll just remember from your last session. So normally, you just tap start to begin, at which point you’ll be taken here, ready to begin pedaling:
You’ll notice that it says there’s some 50-odd seconds left till the class starts. Peloton automatically adds a one-minute buffer (which you can tap to skip) where they basically explain how to use a Peloton Bike. But this is a good time to get settled, so I rarely skip it. The timer and your recorded session do not start until the class officially starts at the 0:00 marker. Inversely, once the 30:00 marker hits (or whatever the specified length of the class), the class recording ends – even though the class post-ride video stream usually continues for a few mins of stretching/cool-down.
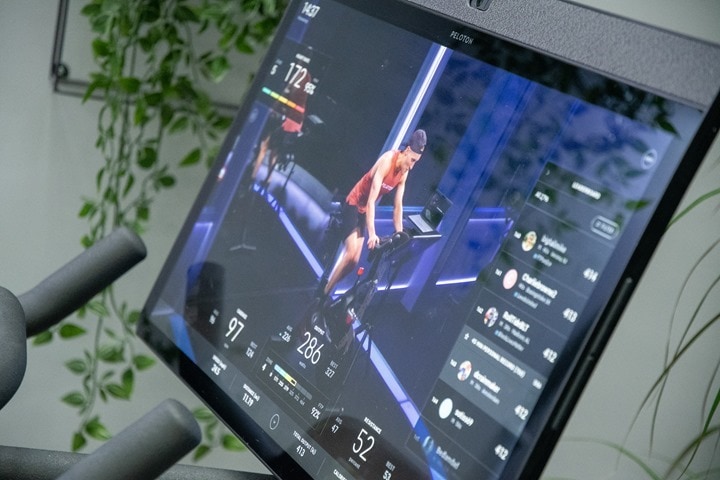
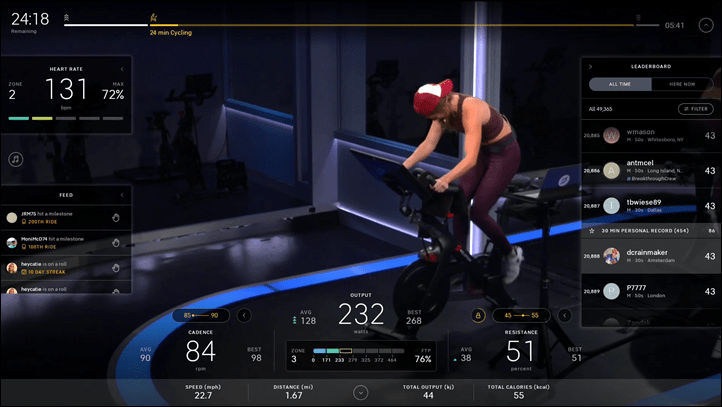
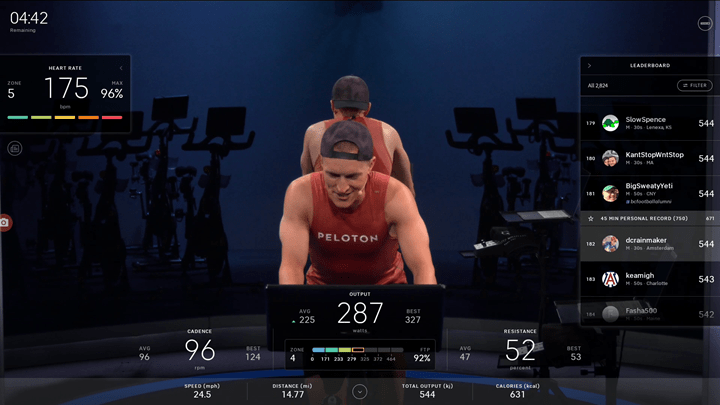
Once in the class you’ve got a bunch of panels on the screen – all of which you can choose to collapse/hide if you want.
Here’s the quick overview of all the data panels:
Left side – Heart rate: Shows your current HR & HR zones
Left side – Feed: shows high-five notifications, where you can get/give high-fives from others in the class
Left side – Music: Will show the current song, and allow you to add it to a Spotify or Apple Music playlist
Top – Timeline: This shows, very broadly, the chunks of the class (warm-up/main chunk/cool-down/arms), it doesn’t show intervals
Bottom – Total stats: Along the very bottom are total speed/distance/output/calorie stats
Bottom – Current data metrics: This shows your current cadence, output (power), and resistance levels, as well as avg/max for all. Plus power zones.
Right – Leaderboard: This is your current rank against both others in the class and yourself, measured based on total output (kilojoules), you can filter this too.
Now to talk a bit about the ride feel. The Peloton Bike & Bike+ are both effectively spin bikes with a gigantic flywheel up-front, so your pedals are tied to that flywheel, and thus you can’t simply stop pedaling and coast like on a ‘normal’ bike. That has its pros and cons, but ultimately I find it perfectly fine for this type of training/workout. One benefit to this though is that it’s totally silent. There’s zero noise coming from anything down there. Your breathing will easily exceed any and all noise from the bike…because there is no noise from the bike. This means that you could easily wear headphones and do the workout in a room with someone else sleeping if you wanted to (assuming the screen light doesn’t bother them).
Now in terms of the feel, despite having a huge flywheel, it won’t generate that same road-feel like inertia when you sprint or deaccelerate, largely because with the flywheel always driving the pedals, you can’t get that slight bit of detachment from the inertia as if you were to coast – instead, your pedals continue to rotate. For what are effectively structured workouts on Peloton, that’s not really an issue (in fact, it makes total sense). But if you were to translate that feeling to the ups and downs of a virtual road (such as Zwift), it wouldn’t have the same feeling as a smart trainer would.
In any event, during a class the instructor will call out cadence and resistance ranges for you to target. Resistance ranges are simply from 0 to 100, and based on the position of the red knob. You rotate the red knob to make the resistance harder or easier. Meanwhile, cadence you control simply via spinning your legs faster or slower.
Because the Peloton Bike is tied to the flywheel, your total output is a dynamic combination of those two elements. So if you set the resistance to 50, and started with a cadence of 80, and then increased your cadence to 90, your power (or what Peloton calls ‘Output’) will rise. Whereas on a typical smart-bike, those two are detached and if you set a given resistance (wattage) level, it’ll keep that level no matter your cadence. Mind you, Peloton could implement that too if they wanted to. The stepper motor technology in the Peloton Bike+ is identical to that used in some smart trainers.
In any event, you’ll see the instructor ranges listed on the screen, and if your current levels are between those two values, it’ll show up in yellow. Note that on live classes these won’t display however, as they tend to take a few hours or even a day to show-up (which is a disappointment). Given these are well known ahead of time (and timed to things like music), there’s zero excuse for this. But hey, it’s better than back in September when this was taking days to show up. Still – c’mon Peloton, this should be nothing more than a timed text file for your instructors, it’s already on their instructor screen.
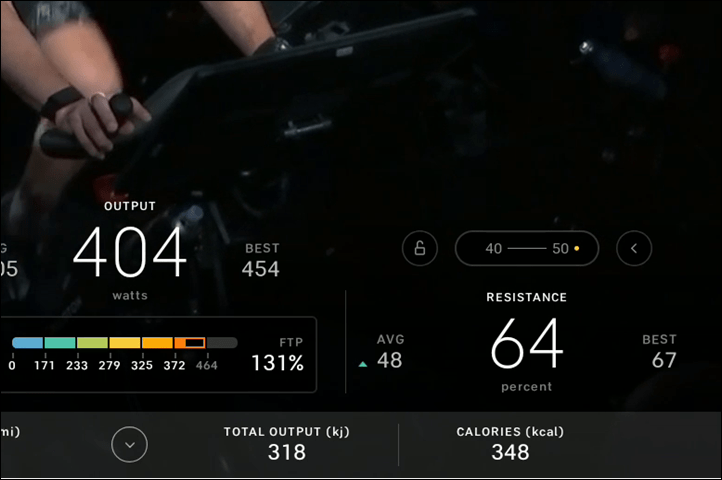
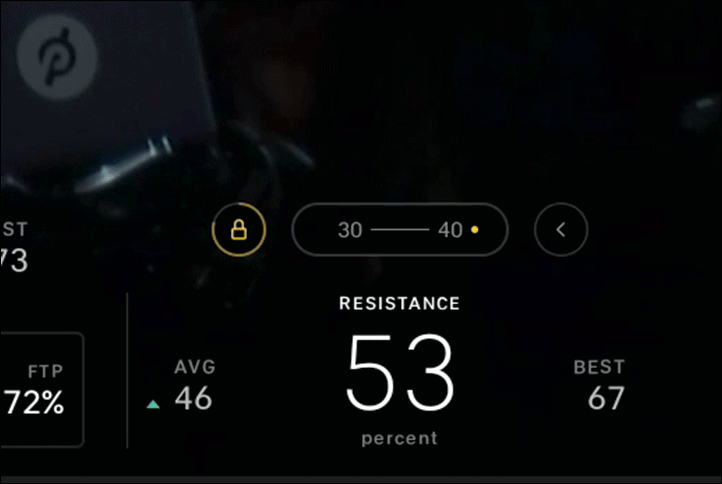
Now on the Bike+ you’ve got a new feature called ‘Auto-Follow’ option, which automatically changes the resistance level of your bike for you. You’ll see above how there’s a little yellow ‘Lock’ icon next to the resistance level. To enable auto-follow you’ll simply tap the little lock icon next to the resistance levels during the workout, and it’ll automatically start controlling your resistance levels. The knob itself won’t turn, but under the covers it’s changing the resistance levels of the magnets aside the flywheel.
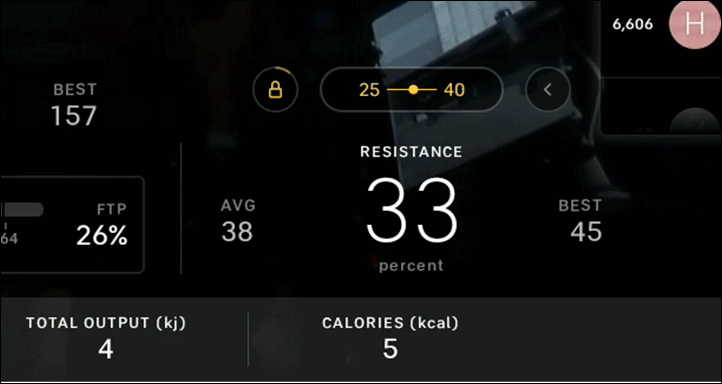
Once enabled, auto-follow essentially has a range that it keeps you within. Typically an instructor will specify a defined resistance range for that portion of the workout, such as between 25 and 40 ({c9ada2945935efae6c394ba146a2811ce1f3bfd992f6399f3fbbb16c76505588} resistance). By default, if you simply toggle auto-follow it’ll keep you at the mid-point of that range (33{c9ada2945935efae6c394ba146a2811ce1f3bfd992f6399f3fbbb16c76505588}). Each time the range changes, it’ll change automatically to the mid-point of the next range.
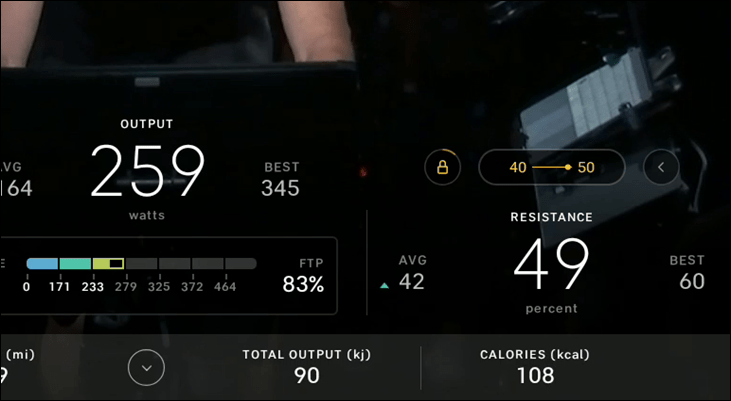
However, you can manually change the resistance knob to within the lower or upper end of the range, and then it’ll keep you in that same relative position on the range going forward. So if you were at the upper end (49{c9ada2945935efae6c394ba146a2811ce1f3bfd992f6399f3fbbb16c76505588} on a 40-50{c9ada2945935efae6c394ba146a2811ce1f3bfd992f6399f3fbbb16c76505588} range), and then the next set jumped to a range of 55-65, then it’d slide you to 65{c9ada2945935efae6c394ba146a2811ce1f3bfd992f6399f3fbbb16c76505588} for that next set. And so on.
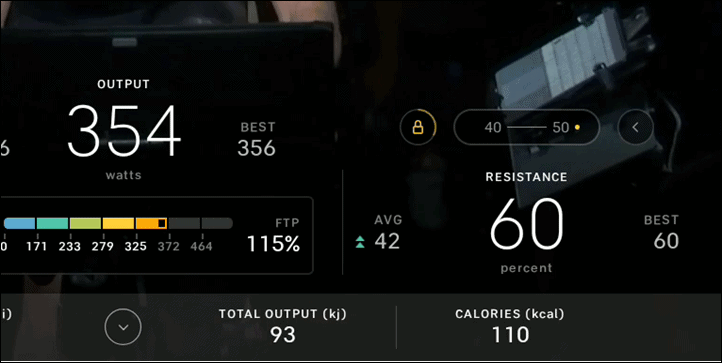
However, if that still isn’t enough (or, is too much), then you can use the resistance knob to override (either higher or lower). It’ll immediately break you out of auto-follow for that specific target set (but keeps auto-follow enabled), but then upon hitting the next set it’ll snap you back into the range at the top (or bottom) of the range. Honestly, this is kinda stupid. The point of going over the range (or under) is because the range isn’t working for you. I’d have thought Peloton would have simply done the math (either {c9ada2945935efae6c394ba146a2811ce1f3bfd992f6399f3fbbb16c76505588}-based or actual unit-wise) to keep you relative to the range. After all, they did the math on the in-range bits.
Still, I suspect this is something we could see change with feedback. For myself, I tend to go on the higher end or slightly over – and usually by a set amount (e.g. increasing the resistance by 10{c9ada2945935efae6c394ba146a2811ce1f3bfd992f6399f3fbbb16c76505588}/units – e.g. 50{c9ada2945935efae6c394ba146a2811ce1f3bfd992f6399f3fbbb16c76505588} to 60{c9ada2945935efae6c394ba146a2811ce1f3bfd992f6399f3fbbb16c76505588}). Not every workout, but just when I’m feeling frisky.
And where this gets messy is half-hearted attempts to add in resistance levels on some classes. For example, this class I did from Christian Vande Velde, has resistance levels in it – but they’re basically useless. In the class he calls out ‘Zone 6’, while the resistance levels only put me in Z2 or Z3. So I have to override each set significantly (by +15-20 units). So eventually you just give up and turn auto-follow off.
However, a neat tip: The yellow lock icon is actually also serving as a timer for that exact interval. Previously, there was really no way to know exactly how much time was left in an interval unless the instructor noted it (and accurately so – which…varies). Now, because it requires everything really be specified within the platform so the Auto-Follow can work, it’s giving you that tidbit of information. So below, you see the screen is at roughly 75{c9ada2945935efae6c394ba146a2811ce1f3bfd992f6399f3fbbb16c76505588} completion of the yellow icon:
Now again remember, the two caveats here:
– It doesn’t work for live classes
– It doesn’t work for Power Zone classes
Oh – right, I didn’t mention that yet. Arguably the biggest benefactor of Auto-Follow would actually be Power Zone classes, where exact specificity is most needed and most beneficial (Power Zone classes are classes where you aim for a specific power zone target, rather than a resistance knob target). There are many ways this could be implemented, none of them are hard – and none of them are groundbreaking. It’s what smart trainer companies have literally been doing for decades. The resistance level would just be automatically set to the mid-point of your power zone, as calculated by the mid-point of the cadence called out for that interval. In other words, just apply the same mid-point theory to the stepper motor.
But worse that than, setting aside the auto-follow for a second, Peloton doesn’t even bother to show the current targets on a Power Zone workout. For example, in the below Power Zone workout, I’m supposed to be in Zone 5, with a cadence of 80-100RPM. However, why isn’t there any on-screen yellow elements indicating that like regular workouts? Again – the instructors know these steps on their screens, the data is already there. Make it visible here too.
Now, while I just finished being annoyed about Power Zone classes, the reality is that these are the bulk of the classes I do – because they’re so good. Essentially, Power Zone classes are highly structured workouts that only focus on a given power zone. The exact type of workouts range with some focused on endurance, while others focused on top-end zones. Within the Peloton realm, only a couple of instructors do Power Zone workouts regularly, all of which have either pro-level cycling experience or significant real-world cycling/triathlon coaching experience. Matt Wilpers being one of my favorites and regulars – and in fact a class I took of his just a few hours ago.
Another being former pro Tour de France cyclist Christian Vande Velde occasionally guest instructs some classes, as with Christine D’Ercole, both national and world champion masters track cyclist.
And ultimately, these workouts are just as structured as anything you’ll find on TrainerRoad. At least in a standalone sense. Meaning – the exact benefits of a given workout between these Power Zone workouts and a TrainerRoad workout would be indistinguishable from a time-in-zone standpoint. And from a structure standpoint, I could put them side by side unlabeled and you’d have no idea which was which.
However, what does differ between Peloton and something like TrainerRoad is that TrainerRoad pulls together cohesive training plans with an end-goal, and then varies the intensity based on that goal. Peloton on the other hand doesn’t have anything like that. Every workout is largely designed to stand on its own. Of course, with power zone as a concept, the idea is that you update your zones every month or two, and thus the intensity and benefits increase over time. But Peloton isn’t structuring workouts to meet your longer term race/fitness goals, whereas TrainerRoad (or like) is. So to achieve that same thing on Peloton, you’d simply need to put a bit of coaching know-how to compile a weekly collection of Peloton workouts together that give you the same result.
Point here being that if your impression of Peloton is just a bunch of fluffy musical dance workouts that don’t get you outdoor cycling fit, you’re very much mistaken. Yes, there’s plenty of less focused workouts on Peloton, just as there are plenty of less focused fluff group rides on Zwift. They all serve a place, and sometimes that place is recovery rides – mentally or physically.
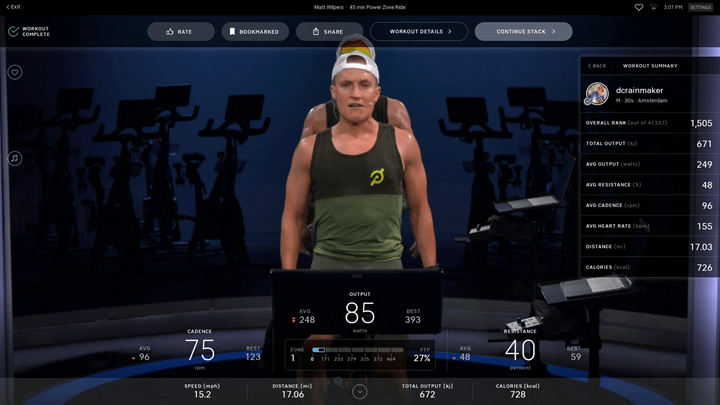
Now, once you finish up the class (45 mins in this case), the instructor will often do a cool-down/stretch of sort afterwards. Like the 60 seconds pre-workout, this isn’t recorded in your workout file either. At this point, if you’ve created a stack (which is a play-list of workouts to do one after another), you can skip to the next workout in the stack. In general, most Peloton workouts these days are designed such that you’ll probably do a 5 or so minute cool-down workout afterwards, as most Peloton workouts tend to wrap-up the hard interval portions with about 60-seconds remaining. You’ll see the ‘Continue Stack’ option at the top. Along the side there are the totals for the class.
If you choose to continue to another workout, you’ll get immediately started on that. Or, you can also rate the workout too. Otherwise, you can skip off to see the full details of that workout in your history, as well as past workouts.
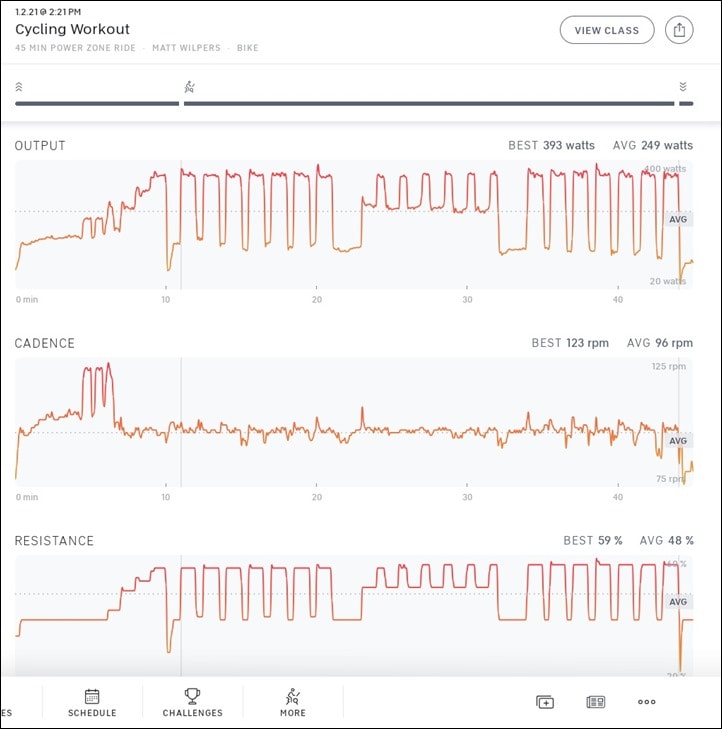
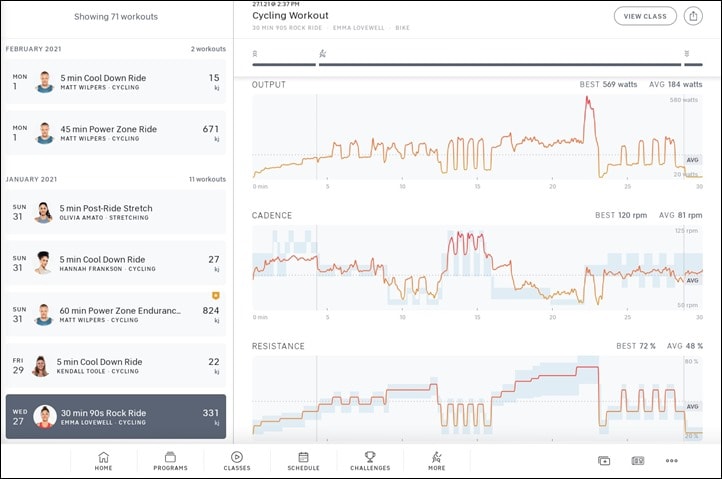
For workouts that have targets set (non-power zone workouts), you’ll also see the targets shaded in light-blue on the workout summary screen. Again, this won’t show for power zone workouts
These workouts will then instantly sync (the split-second the workout completes) over to Strava and Fitbit. Literally, I get a Strava ride uploaded notice within 1-2 seconds of the ride timer ending.
And with that, that’s the entire in-ride aspect covered in significantly more detail than you ever needed. Other workout types like core/yoga/stretching are all largely identical. So if you were to then tilt the screen in a different direction to do those workouts from the floor or standing nearby, you could do so easily.
Power Accuracy Analysis:
If you’re new around these parts you’ll likely be blissfully unaware of the rabbit hole journey you’re about to partake. But regulars know this section of my reviews well. For smart bikes, trainers, and power meters that claim a given accuracy level – I validate (or invalidate) that claimed accuracy level.
In the case of Peloton, they display your watts (power output) on the screen, and it’s fundamental to certain types of workouts, such as the power zone workouts done by various instructors. The reason you care about the accuracy of power data is that if you do these workouts week after week, month after month, and year after year – you want to be able to see improvement.
For cycling, power output is the *only* way to compare efforts between yourself (or others). You cannot use distance as that would be impacted by terrain, wind, and even gearing or weight. Technically one compares watts per kilogram (w/kg) (which is simply your power output divided by your weight), but we’ll ignore that for the purposes of this conversation.
Now typically I’d argue that consistency (precision) isn’t good enough. Meaning that a device has to be both consistent and accurate. And that’s largely true here too, I still argue that. However, I’m also realistic in that you can still get very fit with a consistent but inaccurate indoor bike – especially if you never care about going outside and having power data there. But more on that later. I’m going to show largely recent Peloton Bike+ data, but also some of my first rides too, from 5 months ago – merely to illustrate nothing has changed. And then at the end, I’ll give you a teaser for next week’s regular Peloton Bike in-depth review data accuracy.
Let’s start by looking at a ride from Monday, which was a 45-minute power zone workout with some rather beastly 30-second and 60-second intervals. I regularly use 30×30 style workouts to test smart trainers and bikes, because the huge wattage/power jumps push systems to their limits. In this case, I’m comparing against the well respected PowerTap P2 power meter pedals, which I’ve used for years around the DCR Cave against dozens of trainers and other power meters. Here’s that data set at a high level:
I’ve applied a 5-second smoothing on this, just to make the graph more easy to read. The PowerTap P2 data is a bit more jumpy (as most power meters are) than the Peloton Bike+ data, thus this makes it easier to see the trends. Overall, things are exceptionally close. However, you will notice a very slight power shift by the Peloton Bike+ from start to finish, about 1{c9ada2945935efae6c394ba146a2811ce1f3bfd992f6399f3fbbb16c76505588}-1.5{c9ada2945935efae6c394ba146a2811ce1f3bfd992f6399f3fbbb16c76505588}, which is well within the range of any smart bike in the industry.
I could actually see it by the end of the last set of intervals, as for the first main set I was using a precise cadence of 96-97RPM with a resistance knob of 56 to get ~355w. However, by the last set, I had to bump that up to 57 (resistance) in order to maintain the same power of ~355w. Hardly a big deal (and far less inaccuracy than some/most trainers I deal with). Note because Peloton doesn’t have auto-follow enabled in Power Zone workouts, this was fully me manually moving the knob.
About the only other complaint one could have here is that you can see the Peloton Bike+ isn’t quite as fast as the PowerTap P2 pedals when I go from high cadence (120RPM) to normal cadence (95RPM) to adjust power (or vice versa). It takes it an extra second or two:
This too is super common among trainers and smart bikes, in fact, almost all of them will demonstrate this during a high cadence jump, though probably the Peloton Bike a touch bit more due to the weight of the flywheel lag.
Still, this is a darn impressive set overall. I know that may not be obvious, since I tend to focus on the nuances of where things went wrong – but let me be super crystal clear here: This is more accurate than either the Wattbike ATOM 2020 or Stages SB20 Bike. It’s also on-par with either the Wahoo KICKR Bike or Tacx NEO Smart Bike (though, the Tacx Bike took countless months after launch to fix, the Peloton Bike+ worked out of the gate). Again however, do NOT convey the Bike+ accuracy to the original Peloton Bike (non-Plus).
Next, let’s switch to an auto-follow workout – but not a Power Zone one. This one was a standard issue 30-minute workout with all the regular meanderings. Here’s that data set:
And again, as you can see – it’s virtually spot-on. In fact, because this workout tended to be a bit lower intensity (and also a bit shorter), the accuracy seems to be even tighter. In this little section below where I do some higher cadence 110-115RPM work, you see the very slight bit of 1-2 second lag coming in and out of those intervals. The net is a wash, because it lags on both sides, and again – this is on par with anything else out there.
Now for fun, let me remove the 3-second smoothing I have on this set, and show the exact same thing without smoothing. You can see that the Peloton Bike+ data is smoothed more than an average power meter, but at the same time, this PowerTap P2 power meter data is slightly jumpier than on a normal bike. I suspect the forces of the flywheel are actually causing some of that, as I don’t usually see that off the Peloton Bike. No biggie, just interesting.
As far as cadence accuracy goes – it’s almost spot-on as well. A few single-second delays when the cadence goes up, but again, inline with any other smart bike/trainer on the market. The dropout you see at the end is actually from the PowerTap pedals to the Garmin watch. Probably just some wireless interference.
Now at this point, I won’t lead you on anymore – every single Peloton Bike+ data set I have over the last 5 months is perfect. The only time it wasn’t in perfect agreement with the PowerTap power meter pedals was when one of the batteries died on the PowerTap pedals, in which case…the power no longer matched. Of course, one can hardly blame Peloton for that. 😉
Still, to throw a few more charts out there. Here’s another workout from a few weeks ago – another power zone data set:
It’s essentially perfect.
Or, we can go back to some of my first couple of Peloton Bike+ sets, straight onto the first two rides. Here’s ride #1 I did and what that data looked like:
Note that in that first ride above there was still a little bit of settling going on in the PowerTap P2 pedals being just installed. You can see it stabilize over the course of the first ride, totally normal for pedals.
And then here’s the 2nd ride, showing how things have stabilized on my pedals (nothing to do with Peloton), and it’s spot-on:
Meanwhile, as a teaser for next week – here’s two datasets from a regular Peloton Bike (non-Plus) compared to a set of PowerTap P1 pedals:
And another:
However, let’s not get to far ahead of ourselves here. This review is about the Peloton Bike+, and in terms of accuracy there, things are really, really good. For my unit (and thus sample size of one), I’m getting very strong results. Most of the posts I see from others with the Bike+ seem to mirror that; though, I have also seen a couple of what I’d dub extreme outliers – where things are really bad. Almost a case of feast or famine. I don’t have any idea on why a handful of bikes have gone askew.
But I can at least say that this particular bike and the accuracy implementation that Peloton has done with the Bike+ is definitely on par with any smart bike offered in the market today, and any trainer. Which isn’t to say it has all the other features, but in terms of base and cadence power accuracy, there just isn’t any real issues here – it nails it.
(Note: All of the charts in these accuracy portions were created using the DCR Analyzer tool. It allows you to compare power meters/trainers, heart rate, cadence, speed/pace, GPS tracks and plenty more. You can use it as well for your own gadget comparisons, more details here.)
For the Geeks:
This short section is mostly for the geek-minded that points to other resources I’ve got on doing more advanced things with the Peloton Bike & Bike+ units. I’ll add to this over time. It’s phrased as an FAQ, merely because despite my propensity to write waaaay too much, I like short and quick things:
Does the Peloton Bike/Bike+ broadcast your power via ANT+ or Bluetooth Smart?
No, it does not. Full stop. Despite it being crazy trivial for Peloton to do that via Android, they’ve never done so. However, there are multiple 3rd party projects underway to do exactly that – some more refined, some more geek-heavy. I recently covered SHIFT, a Kickstarter project that didn’t quite raise enough money this go-around, but it sounds like we’ll see more there soon. However, for my non-Bike+ model, I’ve been using DFC in beta the last few months, and it’s working awesome for me. An updated model will be Bike+ compatible when they announce availability here soon.
Can I use the Peloton Bike with Zwift or TrainerRoad?
Kinda? Basically, you can install Zwift on it, and in fact, here’s my complete guide for doing so. However, because the Peloton Bike/Bike+ doesn’t broadcast power natively via ANT+ or Bluetooth Smart, you’ll need power meter pedals installed on the bike (like I do). I’d recommend the Favero Assioma or Garmin Vector 3 pedals these days, as it appears the other favorite of PowerTap P2 pedals are no longer being sold. Once DFC becomes available as a buyable product, then I’d likely recommend that instead, since it’ll be far cheaper and match your Peloton Bike/Bike+ exactly.
Can I install other 3rd party Android apps on it?
Yes. Mostly. You can follow my Zwift/TrainerRoad guide, but just stop after the ‘Fundamentals’ section, and then install whatever Android app you want. The Peloton Bike does not have the Google Play store on it, so you’ll need to sideload apps. While last month Peloton made it slightly more difficult to access your own apps on the Bike, it just adds one more minor install step instead. Still easily doable for anyone that wants to side-load Android Apps.
If I’m the President of the United States and want to use a Peloton Bike, how do I do so?
Fear not, I’ve got that covered in a post too! Blending my time working in such organizations with my time as a sports tech reviewer. Enjoy!
Should I get a Peloton Bike or a KICKR/Tacx/Stages/Wattbike?
Really depends on what you want to do with it – or whether you or your spouse might win that argument. If you’re primarily riding Zwift, then I’d recommend those other bikes. Whereas if you’re primarily riding Peloton, then definitely a Peloton Bike. If you’re splitting time, then frankly that’s a tough spot to be in right now, since it basically means you need to either buy power meter pedals, or wait for a 3rd party power broadcasting solution (like DFC).
Does Peloton have an API?
No, not really. At least not officially. There’s some apps that have creatively coded things, but it’s all mostly via screen-scraping. Which is too bad, I think there’s lots of creative opportunity to expand sites like PeloBuddy and others with better integration. Increasing community content virtually always drives interest and stickiness in a product, no matter how hot the product might be.
Wrap-Up:
There’s no doubt that the Peloton Bike+ is expensive, and that’s before you consider the $40/month subscription fee. However, that fee is still far less than what most gyms would charge for instructor-led spin classes, let alone a full month of it. Of course, these days such classes are pretty rare. Equally, the price of a Peloton Bike+ isn’t much different than that of a medium to high-end smart trainer and a $1,500 bike. Albeit with a different focus.
And that’s the thing. Ultimately, whether or not to get a Peloton Bike (of any model) largely depends on your goals and motivation, and how you prefer to get or stay fit. And the numbers Peloton show in their earnings calls each quarter (including here in a few hours), show that Peloton customers are astoundingly happy with their bikes and the service, with Bike/Bike+ subscription churn rates well under 1{c9ada2945935efae6c394ba146a2811ce1f3bfd992f6399f3fbbb16c76505588}/month – which is incredible in any industry. And the fact that the resell value of a Peloton bike, even pre-pandemic essentially holds value is also worth giving thought.
For me personally, I enjoy using Peloton as another component of my ‘fitness meal’. In the way that I wouldn’t eat the same dish every day of the week, I also don’t use the same training platforms or workouts each day of the week. Some days I’m riding Peloton, some days I’m out running, some days I’m riding Zwift, and some days I’m eating ice cream.
Which isn’t to say it’s perfect. As noted, I find the live class situation (even pre-COVID) poor (at best) for anyone other than US East Coast dwellers. I find the lack of current target information in Power Zone workouts mind-boggling (let alone lack of Auto-Follow), as is the non-existent level of integration with other platforms beyond just Strava and Fitbit. Ironically, all these things are relatively easily fixed – should Peloton desire to do so.
Still, the key thing that keeps me coming back to Peloton is the ‘just works’ factor. Never once has either my Peloton Bike+ or Bike crashed, or had sensor connectivity issues. I know that if I plan for a 45-minute session and jump on the bike, I’ll be done in exactly 45 minutes without any fiddling or troubleshooting. Sometimes the price of stability is worth it.
With that – thanks for reading!















More Stories
Snowmobile ATV Helmet Cameras For Snowcross Racing, Trail Riding, and Mountain Climbing
Quad Bikes – Joy On Four Wheels
Choosing The Best Way Of Selling Cars